Wednesday, December 18, 2013

Chocolate Whiskey Cake

In celebration of Christmas, I decided to try something new! Some of you may call it insane, but if you are anything like our friends from church you will find this crazy awesome.


Now, I don't know much about whiskey--I just got the cheap stuff. I am sure that the deliciousness of the cake would be maximized by a better brand.


It may just look like an ordinary chocolate cake, but in reality it is full of layers of deliciousness. This chocolate cake isn't just chocolate skin-deep. It's rich; it's moist and sticky; its pure delight!

1. For the cake:

-3 ounces dark chocolate, chopped
-1 1/4 cups water, boiling
-1/4 cup of whiskey
-3 cups sugar
-2 1/2 cups all-purpose flour
-1 1/2 cups unsweetened cocoa powder (not Dutch process)
-2 teaspoons baking soda
-3/4 teaspoon baking powder
-1 1/4 teaspoons table salt
-3 large eggs
-3/4 cup vegetable oil
-1 1/2 cups buttermilk (or instead of buying buttermilk--pour 1tbsp. lemon juice into your measuring jug and fill up to 1 1/2 cup mark with milk--let sit for 5 minutes until buttermilk!)
3/4 teaspoon vanilla

*I used two 10" pans for this recipe, but you can, in fact, do this in three 8" pans--you may just have some batter left over. Use between 3-3 1/2 cups of batter per 8" pan, and 5 1/2-6 cups of batter for a 10" pan.*


Butter your cake pans, and fit with buttered parchment paper circles. Preheat your oven to 300F.

Toss the chocolate in a small bowl and pour over the boiled water and the whiskey. Let stand.

In a medium-sized bowl sift together the sugar, flour, cocoa powder (careful it doesn't get all over you!), baking soda, baking powder, and salt.

In a large bowl with an electric mixer beat eggs until super frothy, pale yellow, and slightly thicker (this should take a few minutes). Slowly add oil, buttermilk, vanilla, and melted chocolate mixture to eggs, beating until combined well--not forever--just until combined.

Stir in the flour mixture by hand until just combined--it may have a few lumps--we like those.

Divide batter between pans and bake in middle of oven until the center no longer giggles when you move the pans---about 1 hour and 10 minutes for a 10" pan.

While the cakes are cooling, let's work on the whiskey syrup!


2. Whiskey Syrup

-1/2 cup of  water
-1/2 cup of brown sugar or natural white sugar
-1/4 cup of whiskey

Combine the water and sugar in a small saucepan over medium-high heat. Stir continually at a simmer until the sugar is fully dissolved. Add in the whiskey. Bring to a gentle, rolling boil (not an "oh-my-gosh-it's-all-over-me" boil) for about 3 minutes--still stirring often--and then take it off the heat. Cool for about 5-7 minutes until it's a syrupy texture.


 Once the syrup is syrupy, drizzle it over your cakes--SLOWLY.  Give it time to sink into the cakes. Don't let it all run down the sides. In fact, leave about a 1/2" perimeter around your cake that has not been touched by the syrup.


Let the cakes keep cooling.

In the meantime, we will whip up some buttercream frosting.Now, for this sort of cake, we actually want something thick, sugary, rich, and delightful--so I am devolving--I am going back to a run-of-the-mill buttercream recipe for  today (shhh...don't tell!!). Those of you who know me and cakes, know that I preach the ways of Swiss buttercream--see these two awesome cake recipes for  more. 

3. Whiskey Buttercream

 -1 cup of butter (two sticks), softened
-3 cups of powdered sugar (plus more)
-3 tbsp. whiskey
-4 tbsp. heavy cream
-3 oz. dark chocolate 

Melt the chocolate in the microwave for 30-second internals, stirring in between, until fully melted. Set aside.

In a medium-large bowl, beat the  butter until it is light and fluffy. Stir in the powdered sugar by hand--so you don't get it all over your kitchen--and then beat it with the mixture until fully combined. Pour in the cream to loosen it up a bit. Now, pour in the whiskey and keep beating until fluffy and light. Finally, pour in the chocolate and gently stir to combine. Taste, and add more whiskey or more powdered sugar as you desire.


Now, you must start putting the cake together. Lay out your first layer on your cake plate or turn table. Stick a few pieces of paper towel around the edges to catch the drips. Now, plop a big dollop of buttercream on top of the layer (half of the mix for a 3-layer cake, or just as much as you need for the 2-layer). Spread it around evenly, being sure to keep a 1" perimeter  free of frosting (or else it will all squish out the sides with you press on the next layer).


Next, place on the next cake layer (and repeat the last steps if you have a 3-layer cake). 


Now, the last thing we have to make is the ganache! Then we can finish up this cake.

4. Chocolate Ganache (No Whiskey Required Here...)

-9 ounces of dark chocolate (60%)
-1 cup of heavy cream

Heat the cream in a small saucepan until it just comes to a boil, stirring constantly, then take it off of the heat and pour it over the chocolate. Let it sit--without stirring--for 1 minute, and then gently, like you are whisking rose petals, whisk the chocolate into the cream (we don't want any air bubbles). 

Set aside to cool for a moment, until it reaches a thick consistency than won't waterfall down the sides of  your cake. 

Lastly, pour the ganache over the cake. Start in the very middle, and pour only a little, and then wait to see how far it spreads. Keep pouring as needed just until it starts to trickle down the sides of the cake. Now, you can take a spatula and spread some more ganache on the sides of the cake (or just leave it messy!).


Refrigerate until the ganache solidifies. Remove the paper towels and present!


Friday, December 13, 2013

Haute Herby-Cheese Biscuits


My family originates from England--my mom's whole side of  the family lives there, in fact--so that means that we expect our food to taste a certain way. When my family originally moved to NC, we discovered these things called "biscuits" that look just like scones, but instead of eating them with butter, jam, and tea, the Americans would eat them with meat and cheese! How barbaric! We were stunned and confused to discover a "savory scone."

Well, after living here for the past 12 years I have  come to love Bojangles and their  meat-scones (as well as that "sweet tea" stuff--what an abomination!). Today I present to you an ode to the American twist on English  tea-time: the Haute Herby-Cheese Biscuit. It tastes just like it sounds--salty and cheesy and herby. Yum!

Thank you America for your strange innovations....

Ingredients:

-1 Tbsp. Baking powder
-1 1/2 tsp. Kosher salt
-1/2 tsp. Paprika
-4 cups all-purpose flour
-1 cup (two sticks)fridge-cold butter, diced
-8 oz. provolone cheese, grated
-2 Tbsp. finely chopped chives
-1 Tbsp. finely chopped rosemary
-1 Tbsp. finely chopped thyme
- 4 large eggs
-3/4 cup heavy cream, plus 2 Tbsp. for brushing

Combine first 4 ingredients in a food processor (or  by hand in a wide, large bowl). Add the butter and pulse until it is the texture of lumpy cornmeal (if combining by hand, use a pastry cutter or two knives to reach the same consistency).

Transfer to a large, wide bowl and stir in the provolone cheese and herbs.

Make a well in the center and pour in the cream and add the eggs. Using a fork, blend the eggs and slowly incorporate the flour from the sides. Once it's too hard to use the fork, grab a spatula and continue combining the wet with the dry until a shaggy dough forms.

Turn out the dough on a floured board, and form into an 8 inch square, about 1 inch thick. Cut into 16 pieces using a floured  knife or board scraper, and wrap completely in plastic wrap and chill in the fridge for two hours.

When ready to bake, preheat the oven to 400F and line a baking sheet with parchment paper. Place the scones at least 2 inches apart (to leave them room to brown/breathe) and brush with the extra cream.

Bake for 20-25 minutes, until golden brown on top and bottom. They smell really good...You will be tempted to eat them all in one sitting!

*You can make the dough and freeze it up to 1 month ahead.*


Thursday, December 12, 2013

Rustic Ragu with Shredded Pork Shoulder


You know it's good when your man is  silent at the dinner table with his head focused on his plate. It doesn't look like much, but this is the most PERFECT, wintery, yummy dish!! It combines buttery smooth, melt-in-your-mouth pork shoulder with a robust sauce and shell pasta that gently cradles the heavenly goodness....All of those fantastic spices you see below are the secret to sauce greatness.


(See the happy husband....)


This is a modified version of a recipe from Domenica--a New Orleans restaurant. I am so glad I came across it!

Ingredients:

-1 lb. boneless pork shoulder (Boston butt) cut in 1 1/2 inch pieces
-1/4 cup olive oil
-1 small onion, finely chopped
-2 medium parsnips, peeled and finely chopped
-5 mushrooms, diced
-1 garlic clove, chopped
-1 sprig of rosemary
-1 sprig of  oregano (or 1/2 tsp. dry)
-1 bay leaf
-14 oz. can of crushed tomatoes
-1/2 cup red wine
-1/4 tsp. black peppercorns
-1/4 tsp. nutmeg
-1/8 tsp. ground cloves
-8 oz. shell pasta
-1 bunch of kale, ribs and stems removed, torn into 2 inch pieces
-3 tbsp. unsalted butter
-1/3 cup Parmesan cheese

Season the pork with salt and pepper. Heat the olive oil on medium-high in a wide, high-sided pan or a pot. Brown the meat in the pan, until golden and encrusted on all sides. Set aside on a plate.

Reduce the heat to medium and cook the onion, parsnips, mushrooms, and garlic. Stir occasionally, and cook until golden brown--about 8-10 minutes. Color means flavor!

Tie the rosemary, oregano, and bay leaf together with kitchen twine (or not...if you don't mind fishing around for them later!), and add to the sauce. Add the pork, tomatoes, wine, peppercorns, nutmeg, and cloves.

Add enough water to cover the meat. Bring to a boil.

Cover, reduce heat to low, and simmer, adding more water as needed (approximately 1 cup over the course of the cooking process), for about 45 minutes until the meat is very tender.

Discard the herb bundle, and shred the meat using two forks. Continue to cook uncovered for another 10 minutes to thicken the sauce.

Cook the pasta in salted water, drain, reserving 1/2 cup of pasta water.

Add the kale to the meat sauce along with the pasta water. Sprinkle the parmesan over the top, close the lid, and simmer for another 5 minutes to wilt the leaves. Taste, and add salt as needed. Add in the pasta.

Serve, topped with more Parmesan. 


Thursday, December 5, 2013

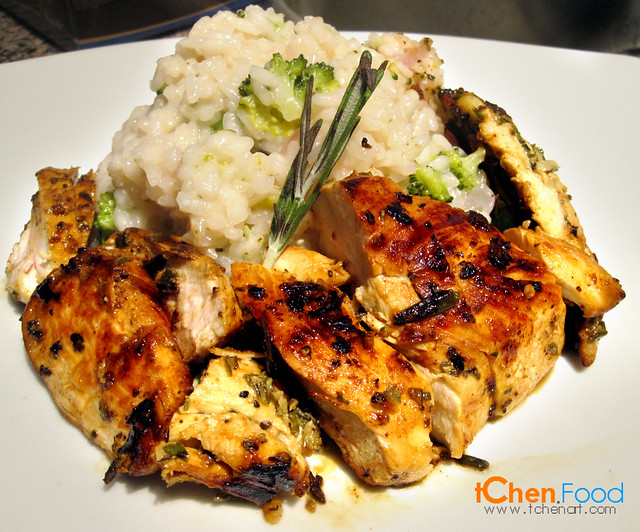
Creamy Parmesan Broccoli Risotto


Last night we decorated our Christmas tree. We had a lovely evening decorating and watching the movie Snow, and by the time we were finished it was about 7:30pm. I saw a rather sad and confused look on my husband's face and realized that I had entirely forgotten to cook dinner. Well, I rushed into the kitchen, and what did I find in my pantry, but some Arborio rice! I grabbed some stock, some garlic, and some broccoli and started right away. I made a fabulous meal within 25 minutes, and we both were grateful! 

At this time of year, not only are my toes and fingers freezing off all day long, but I also really feel like making simple, homey, comforting dishes that don't require a lot of complicated steps. Something about this draining, cold weather makes me just want to crawl under the covers instead of cooking!

Well, this amazing risotto recipe (mmm....just thinking about it is making me hungry) is the perfect combination of simple, elegant, and super comforting. And it's all done in one pot! You're welcome. And husbands will not fret, because this is really good served with plain and simple pan-seared chicken (you can even just cut it into small pieces and toss it into the risotto). Simple, beautiful, scrumptious, high in carbohydrates: risotto. Risotto, for those of you who are thinking That just looks like a glorified rice casserole, is made from a special king of rice called "Arborio rice." You should be able to find this at your local grocery store in the rice section, or in the section with the quinoa and barley and fancy grains.

Arborio rice is fatter and shorter than regular rice, and is cooked in an entirely different way than regular rice (which you will soon see). At the end of the cooking process, risotto is a creamy, rice-ish, vegetable-specked delicacy rather than plain, white, and fluffy. No, you CANNOT substitute regular rice for Arborio  rice in this dish.


Ingredients:

4 tbsp. butter
1 tsp. chopped garlic
1/2 a small onion, chopped
1 cup of Arborio rice
1/2 cup of white wine (optional)
3-3 1/2 cups of chicken or vegetable stock
3/4 cup of chopped broccoli (or another vegetable like asparagus)
1/4 cup of cream
salt and pepper
1/2 cup of Parmesan cheese

Set a medium pot or high-sided pan to medium heat. Once you feel the heat radiating from the pan, add in the butter. Once it begins to sizzle, add in the onions and garlic. Cook until just golden and fragrant. Pour in the Arborio rice and combine with the onions. Cook for a few minutes to fully heat the rice. Next, pour in the wine, and simmer and stir frequently until almost fully absorbed (if you aren't using wine, just use stock here). Pour in 1 1/2 cups of the stock and stir frequently until almost absorbed--this should take about 6-8 minutes. Repeat with the rest of the stock. Add in the chopped broccoli and the cream. Simmer on medium low until creamy. Taste. If the rice is still too firm for your taste, add in an extra 1/2 cup of stock and cook until it is absorbed. Add in the parmesan and salt to taste (approximately 1/2 tsp).

Serve at a lovely creamy consistency. Like I said before, this is positively  grand served with seared chicken or fish with garlic bread.

This is what mine looked like (as you may recall my camera is presently malfunctioning). Yumm....                         


Sunday, December 1, 2013

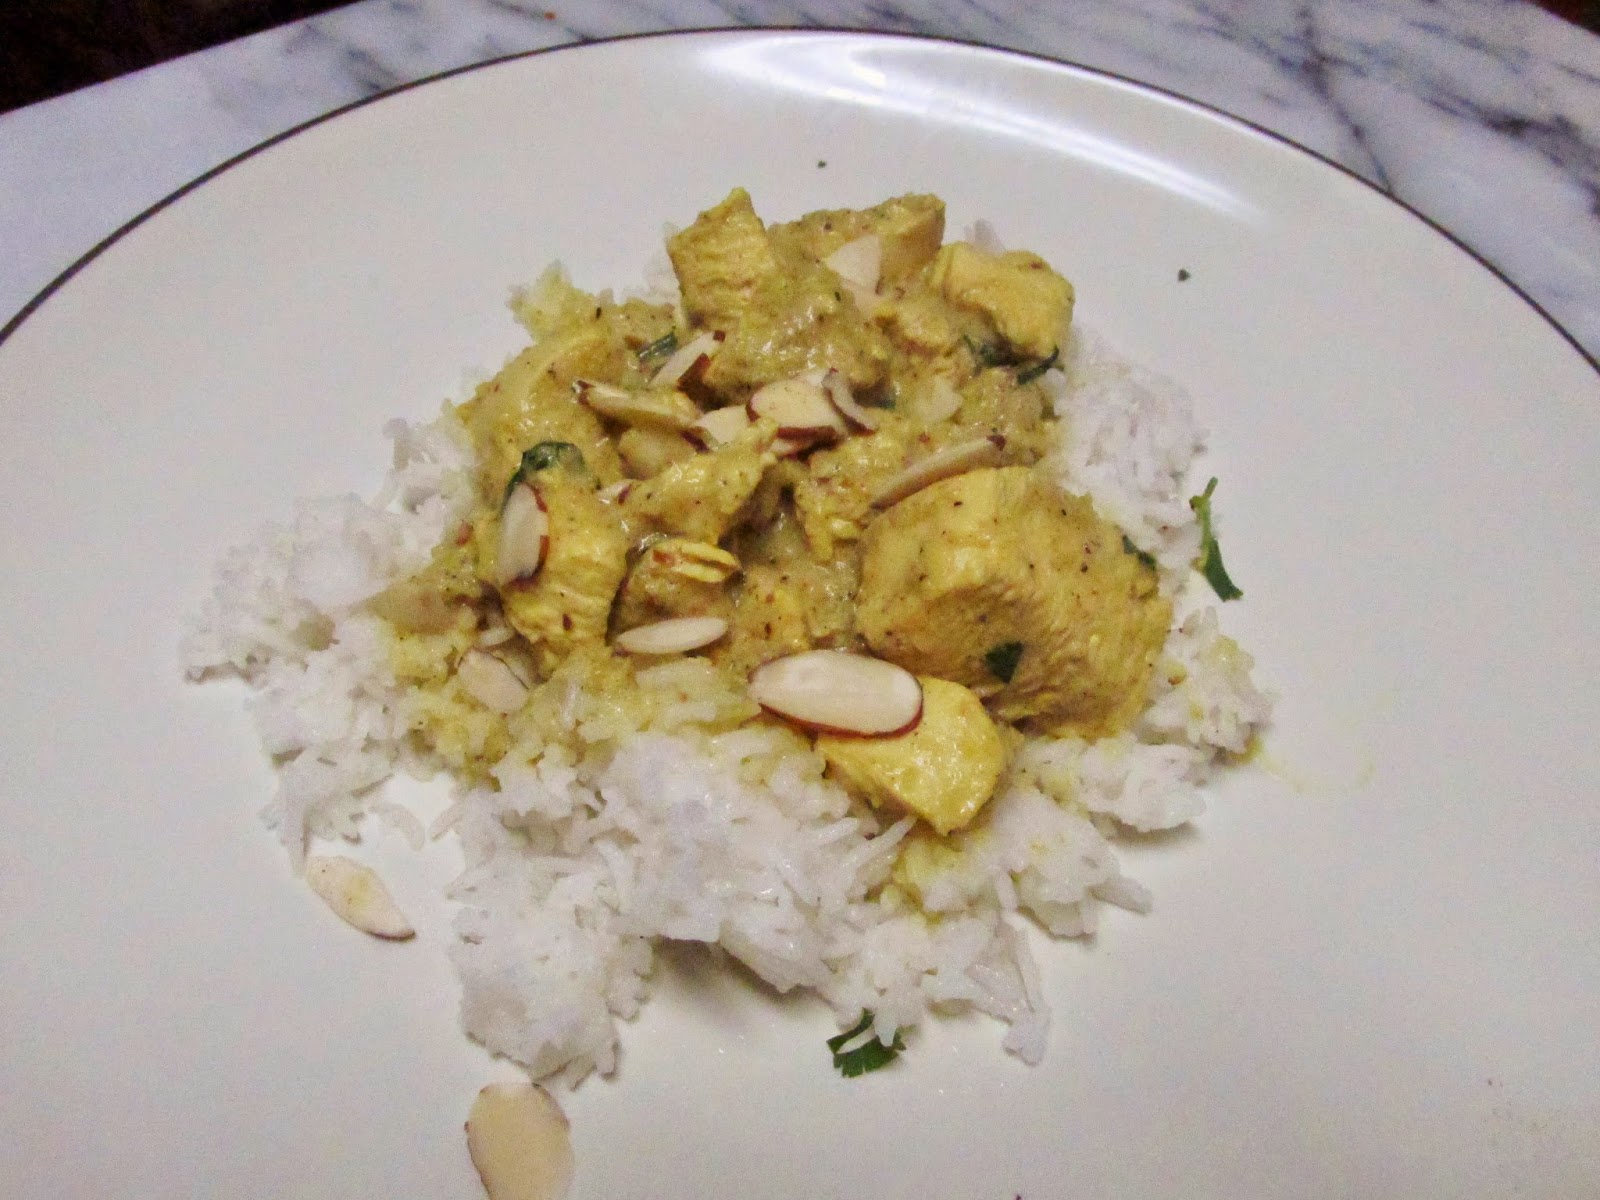
Chicken Korma

(Update 11/21/14: I've remade the recipe finally got some pictures done!)

Hello fellow foodies! My camera has decided to retire from the photo industry and has set itself up in the retirement community of our kitchen drawer. In the meanwhile, I have no fresh pictures to share of my food conquests (at least until Santa gets here)...

I thought  I would take a walk down memory lane a revisit some of  my favorite dishes from previous years. It will  force me to write down recipes that have until now managed to escape from being set in truly measured and quantified terms my blog! Muahahahaha.

So, Chicken Korma. If you know Indian food, you know that the korma  is an amazing, mild, flavorful sauce that is the perfect balance of sweet and spice-filled. This particular recipe is made with a paste of almonds, chilis, and many aromatic spices--it is also  tomato-free (many Indian curries are tomato-based). We serve it either with some naan (that you can occasionally find in your grocery store) or  even store-bought pita bread that you heat up  right before eating to make it soft. Or, of course, you always have the option of  trying to  make your own naan....even though it is rather difficult to achieve the soft-yet-crispy texture that the Indian oven (called a tandoor) can produce in your own kitchen. This recipe is probably going to give you the closest thing to real naan bread flavor.

And now, without further ado--the korma recipe. 


Chicken Korma:

1 lb. chicken breasts, chopped in 1-2 inch pieces
1 tbsp lemon juice
1/2 tsp black pepper
1 tsp garlic paste, or if you can't find this at the store, 2 macerated or finely chopped cloves
2-3 tbsp butter or ghee (available at Indian markets)
1 medium size onion, chopped finely
1/4 tsp turmeric (haldi) powder
 3 tbsp sliced almonds
 8 oz. plain 1% fat or higher Greek yogurt
 1/2  jalapeno pepper or anaheim chili (or whole, depending on how spicy you want it)
4 cardamom pods (or 1/2 tsp.  ground cardamom)
3 whole cloves
2 medium sized cinnamon sticks
1 bay leaf
1 tsp garam masala
 2 tbsp chopped cilantro
1 tbsp sliced almonds
Salt to taste

Marinate the chicken pieces with lemon juice, pinch of salt, black pepper and garlic paste. Rub the mixture thoroughly to the pieces and set it aside for half an hour.

In a heavy bottom pan, heat the butter/ghee and when it is medium hot add the chopped onions and turmeric.Fry till the onions are light golden and then take them out and scrape them into a food processor or  blender. Leave the oil and brown  bits in the pan behind for further use.


Next, add the yogurt, 3 tbsp almonds, and hot peppers to the food processor and blend until very smooth. Pour this mixture on the marinated chicken pieces.


Now reheat the pan to medium heat, add in a splash more butter if the pan is dry, and then add the cardamom pods, cloves, cinnamon, and bay leaf. Stir them for approximately 1 minute and let them sizzle until they are fragrant. 


Add the marinated chicken along with all of the marinade and yogurt paste. Let the chicken cook on medium while stirring occasionally till it boils. This should take about 15-20 minutes.

Then cover the pan with a lid and let it simmer on low heat until the chicken is cooked through.


Finally add the garam masala and chopped cilantro. Give it a taste and add salt as needed ( I needed about another 1/2 teaspoon). Garnish with more almonds.

Serve with basmati rice and naan bread. Enjoy.


Friday, October 18, 2013

Carmelitas: Better Than Brownies


Look at that gooey deliciousness...

This delicious recipe tastes almost like a brownie, except the middle is filled with soft caramel and chocolate. The crumbly oatmeal and cinnamon crust just melts away into each bite. Yes, as your will see, it does require a little patience to let this cool down before you dig in, but good  things come to those who wait!


Ingredients:
1 package of caramel melts (11oz.) (or you can make your own soft caramel-- just use this recipe)
1/2 cup heavy cream
3/4 cup butter, melted
3/4 cup dark brown sugar, packed
1/2 tsp. cinnamon
1 cup flour
1 cup rolled oats
1 teaspoon baking soda
1/2 cup blend of semi-sweet and dark chocolate chips


Preheat oven to 350F. Butter an 8x8 inch square baking pan and set aside.

Mix together melted butter, brown sugar, cinnamon, flour, oats, and baking soda. Pat half of the mixture into the baking pan, and bake in the oven for 10 minutes. While this is happening, combine the caramels and cream in a small saucepan over medium heat until melted into a smooth caramel sauce. Or, if you want to make your own caramel, get started on that now. It will take about half an hour to make, so just be sure you don't forget to take out the crust!

Once the crust is out of the oven, sprinkle your chocolate chips over the top. Pour over your caramel sauce so it evenly covers the crust.


Crumble the remaining oatmeal mixture over the top and return this to the oven and bake it for approximately 15-20 minutes, until edges are golden brown. Remove from the oven and cool completely before serving (I know it's tempting, but if you cut into it while it's still hot it will not hold up at all). You can put it into the fridge for a while to speed things up.


If you want to make a 9x13 amount, simply double the recipe, and also allow more cooking time (mine took about a half hour).


Monday, October 14, 2013

Chicken Pot Pie

In celebration of the oncoming of fall, my husband and I decided that we MUST have Chicken Pot Pie. So last night I made my first homemade one. I was always a fan of the frozen ones when I was little, so I was slightly afraid of attempting to make my own. Well, it's safe to say that this is a million times better than the frozen stuff, not to mention much healthier, and not too difficult to make! I am never turning back.

I recommend making your pastry beforehand--the night before or in the early afternoon--and then all you have to do is roll it out when you are ready to put the pie together.

DISCLAIMER:
America fears making real pies...I will have none of  this! It's just two silly pieces of pastry with a filling. Seriously guys, it's really not hard at all. I don't want ANY of you to cheat on this recipe! Real pastry is a necessity of life and its SUPER easy! You can even make it in the food processor--and even a week beforehand. You MUST make your own. It's the only way. What's the point of "making it at home" if you aren't even using ingredients! Pillsbury crust, Cool Whip, and Campbell's soup all have their place--in the trash...Yes I am opinionated, and yes my pie is better than your yucky store-bought one. Just try it!


For the Crust:
 -1 recipe of double-layer pie crust dough (see my Peach Pie Recipe)

For the Filling:
-2 chicken breasts, pan-seared til cooked, and diced
-1 red onion
-5 medium-sized carrots
-2 leeks, washed, quartered and sliced
-3 cloves of garlic
-2 medium-sized potatoes, diced
-1 tsp. dried oregano
-2 tsp. salt
-1 tsp. pepper
-1 stick of butter
-1/4 cup of flour
-1 cup heavy cream
-1 cup chicken stock
-1 tsp. dried basil
-1/4 tsp. mustard powder


First order  of business, of course, is chopping up those vegetables. Make sure you clean the leeks really well--they are always sandy. I sliced mine in half lengthwise and then washed out the layers under the tap. Then, slice them again lengthwise, and then into small pieces.


Then, get yourself a stock pot out, and set it over medium heat. Once hot, add in 4 tablespoons of butter. Once melted and bubbling, add in your onions, carrots, garlic, and leeks. Let this all simmer together for about 5 minutes, then add in a teaspoon each of salt, pepper, and oregano. Add the potatoes and continue simmering.

Once the vegetables are soft and golden, transfer to a bowl and set aside. In the same pot, add another 4 tablespoons of butter. Once it melts, whisk in the flour and 1 teaspoon of salt. After about 1 minute pour in the heavy cream. Whisk until thickened. Pour in the chicken stock next, and then add in all of the vegetables, chicken, and mustard powder and basil. Stir together and cook until thickened. Set aside to cool.


Meanwhile, roll out your bottom pastry and set it into a pie dish or square casserole dish. In order to transfer your rolled-out pastry, I find it easier to  fold the pastry in half and then half again (see below).


Poke all over with a fork and precook in the oven at 375F for 8-10 minutes.


After this, fill the crust with your filling, and sprinkle with the sharp cheddar cheese. lay the top crust over the pie (using the same folding method as before), and press in the edges. Cut a few holes in the top for air flow, and paint the top with egg.


Finally, place the pie in the oven at 400F for about 20 minutes, until golden brown on top. 


 Serve with a smile!