Thursday, October 1, 2015

Pumpkin-Apple Upside Down Cake


 It's finally fall. This is positively my favorite time of year! We have been craving pumpkin around here for a while. I began imagining something apple-y and pumpkin-y that was born into reality as an upside down cake. This is super moist. The sugar caramelizes on the apples and then soaks in to the cake...doesn't get any better than this.


Ingredients:

1/3 cup butter
2-3 small, tart apples cut in half, cores scooped out with a melon-baller or spoon and sliced thinly 
1/3 cup dark brown sugar
2 cups all-purpose flour
2 1/4 teaspoons baking powder
3/4 teaspoon baking soda 
1 teaspoon salt
1 teaspoon cinnamon
1/2 teaspoon ground ginger
1/8 teaspoon freshly grated nutmeg
1/4 teaspoon ground cloves
1 1/4 cups light brown sugar
4 large eggs
3/4 cup vegetable oil
One 15-ounce can pumpkin puree
1/2 cup buttermilk (sub. 1/2 tsp. lemon juice and fill rest of the way with milk up to 1/2 cup measurement)


Preheat the oven to 325F. Cut the butter into a bunt pan, and place the pan in the oven, until the butter melts. Then, take the pan out again and pour in the brown sugar, stirring it around until mixed. Lay your apple slices around the pan, overlapping them slightly, making a ring shape. 

Put the pan back in the oven to start baking the apples. Then, begin work on your batter. In a medium bowl, whisk the flour with the baking powder, salt, cinnamon, ginger, baking soda, nutmeg and cloves.  

In a separate bowl, using an electric mixer, beat the brown sugar and eggs at medium-high speed until fluffy, 3 minutes. Beat in the oil, then beat in the pumpkin puree. Alternating with butter and egg mixture in three additions, mix everything into the flour mixture, stirring until just combined. 

Carefully pour the batter into the bunt pan, being sure that it spreads out evenly. Cook in the oven for 45 minutes to an hour, until the cake no longer wobbles when you giggle the pan. 

Flip out directly onto your serving plate as soon as it comes out of the oven, and carefully pull the pan off. Tada! Serve warm, with lots of ice cream.


Friday, September 11, 2015

A Most Delectable Steak and Ale Pie

What a glorious way to start off the autumn season. Steak and Ale Pie is a scrumptious dish. Satisfying, rich in flavor and in depth, the falling-apart beef is dressed in a sumptuous gravy. A flaky cheese and herb pastry adds a layer of complexity, too.  With plenty to go around, this will  be hearty, satisfying, and should serve 8 with leftovers.

I always serve this with garlic mashed potatoes that can sop up that gravy! 


Filling Ingredients:


2 tbsp. olive oil
2 tbsp. butter
3 medium red onions, peeled and chopped
3 cloves garlic, peeled
3 carrots, peeled and chopped
2 sticks celery, trimmed and chopped
4 field mushrooms, peeled and sliced
1.5 lb quality brisket of beef or stewing beef, cut into 1 inch cubes (if you get a roast on the bone, drop the bone into the filling along with the beef to add more flavor)
2 rashers of bacon 
a few sprigs fresh rosemary, leaves picked and chopped
sea salt
freshly ground black pepper
1 bottle Guinness or other dark beer
1 qt. beef stock
 1/3 cup flour
1 cup sharp, white Cheddar cheese, freshly grated

Preheat oven to 375F.


In a large pot, heat the olive oil and butter over medium heat until bubbling. Add in your vegetables, garlic, rosemary, pepper, and 2 tsp. salt. Simmer until softened and fragrant, about 5 minutes. Add the beef (and beef bone if you are using it), bacon, and stir in the flour. Next, pour in the beer, and pour over stock to just cover the meat and vegetables. Bring to a boil. Cover with a lid, and then place in the oven for 2 hours, stirring occasionally. Make your pastry during this time.

Remove from the oven, give it a good stir, and place on the stove top. Continue simmering uncovered for another half hour, or until the sauce has thickened and the meat is soft. 

Preheat oven a second time, to 425F. 


Pour filling into a prepared casserole dish of appropriate size (I used a 9x13 pan with high edges). Drape pastry over the pie, cut in a few air slits, and cook for about 20 minutes, until golden brown. 


Pastry Ingredients:

3 1/2 cups all purpose flour
7 ounces lard, cut into cubes (you can also use butter in a pinch)
2 ounces freshly grated Cheddar cheese
sea salt
a sprig of fresh rosemary, leaves picked
a few sprigs of fresh thyme, leaves picked
2 large eggs, beaten
a good splash of milk (about 1/3 cup)
flour for dusting 
Combine flour, cheese, salt and lard in a bowl. Use a pastry cutter or two knives to cut into fine crumbs. Add in the herbs , beaten eggs, and some milk. Use a spatula to bring it all together. When you squeeze the dough with your hand it should keep its shape, and not crumble apart. 
Cut two pieces of cling film and lay them out crosswise. Dump the dough clumps out onto it. Fold the edges of the film over snugly and form it into a square disc, about 3/4 inch thick. Cover with another layer, and place in the fridge for about 1 hour. 
Roll out into a rectangle of about 1/4 inch thickness and drape over filled casserole dish to bake, pressing down edges and cutting off excess (which you could keep for later!). 


Friday, August 7, 2015

Prosciutto Peach Pizza

Another unusual take on pizza...this one doesn't even have pizza sauce! I must say, though, that the peaches for this recipe MUST be fresh. The sweet juiciness will make this mouthwatering. The balsamic drizzle brings a nice sharp sweetness to it.


Ingredients:
-1 recipe pizza dough
-3 tbsp. olive oil and 1 clove garlic, minced
-4 oz. thinly sliced prosciutto
-4 oz. ricotta cheese blended with a pinch of salt and pepper
-6 oz. fresh mozzarella
-2 ripe peaches, sliced
-1 handful of fresh basil, chopped
-1/2 cup balsamic vinegar
-2 tbsp. honey
-some red onion, thinly sliced (optional)

Preheat the oven to 400F.

Roll out the dough into a circle; stretch to the size of your pan. Once the oven is preheated, slide your dough into the oven. Cook for 10 minutes, until the bottom of the crust is firm, then take out again.

Brush the center of the crust with your garlic olive oil, then drape over the prosciutto. Scatter drops of ricotta all around the crust, then tear up pieces of mozzarella and spread them out. Next, spread your peach slices across in a nice pattern (and red onions, if you want).

Cook the pizza for about 20 minutes, until golden brown on top and the peaches are caramelized.

While the pizza is in the oven, combine the honey and balsamic vinegar in a small saucepan over medium-high heat. Simmer until reduced by half, set aside to cool and thicken. When the pizza comes out of the oven, drizzle over the balsamic, and then sprinkle the basil over the top.

Serve!


Thursday, August 6, 2015

Quick, Delicious Breakfast Biscuits

 Okay, so when I say these are "quick," I don't mean that they are microwaveable or anything like that....what I do mean is that the biscuits take less than 10 minutes to get into the oven, and after that, it took about 15 minutes for me to get them to the table with all the finishing touches. Pretty good for a meal that is completely made from scratch.

And just look at those beauties...


 Biscuit Ingredients:
 -2 cups all purpose flour
-4 tsp. baking powder
-3/4 tsp. baking soda
-3/4 tsp. salt
-1 cup buttermilk (sub. 1 tsp lemon juice and fill cup rest of way w/ milk)
-4 tbsp. butter

Preheat the oven to 450F and prepare a pan.

 In a large bowl, combine the dry ingredients. Quickly cut up your butter and sprinkle it into the bowl. Using your fingers or a pastry cutter, combine the butter into then flour mixture until it looks like crumbs (the faster the better; you don't want the butter to melt. We are working for imperfection!). Next, pour in your buttermilk and stir with a spatula until it creates a sticky dough.

Flour a surface and dump your batter out. Flour your hands and fold the dough over itself, with care, 5-6 times, being sure not to press down on it. It should be airy and light. Next, form your dough into a 1 inch high surface, and using a 2 inch cookie cutter or glass dipped in flour, cut out as many biscuits as you can. Reform the scrap dough, working it as little as possible, and cut out more biscuits. You should have 6-7 biscuits when you are done.

Once you have them all ready, brush them with a little milk, and place them in the oven for 15-20 minutes, until risen high and the tops and bottoms are golden brown.


Filling for Biscuits:
-6 eggs
-3 large, thick slices of Virginia Ham
-6 Slices sharp cheddar cheese

While the biscuits are cooking, preheat two pans on medium heat. In the first pan, once it is hot, pour a drizzle of oil, then lay in your pieces of ham--do this in batches if needed. Let the ham sizzle away until it gets  crispy with deep brown spots.

In the second pan, drizzle in some oil to the hot pan and crack in a few of the eggs, sprinkling with some salt and pepper. We like ours over easy. I cook those on the first side until the white is almost completely firm, then carefully, with a rubber spatula, I flip them gently and cook for 30 seconds on the second side, just to firm up the egg white, and then the yolks are still soft. If you want your egg yolks firm--over hard, just cook them on the second side until they feel firm under pressure from the spatula.

Once eggs and ham are finished, cut the ham slices in halves on a plate, and rest a finished egg on each slice.

When the biscuits are ready, take them out of the oven and cut the tops from the bottoms...I think you know what to do next. Assemble, and eat! These are really delicious--SO much better than McDonalds...


Monday, July 6, 2015

Gluten Free Carrot Cake


I am aware that "gluten free" is all the craze these days--however there actually are people out there, like my mom and my best friend from college, who are actually gluten intolerant and cannot seem to digest wheat without major pain and illness. It's so sad that these folks can't have bread or sweets like the rest of us are used to! I think it's great that there are so many people out there experimenting with new kinds of grains and flours to make delicious treats that don't taste "healthy" but are still satisfying and rich.

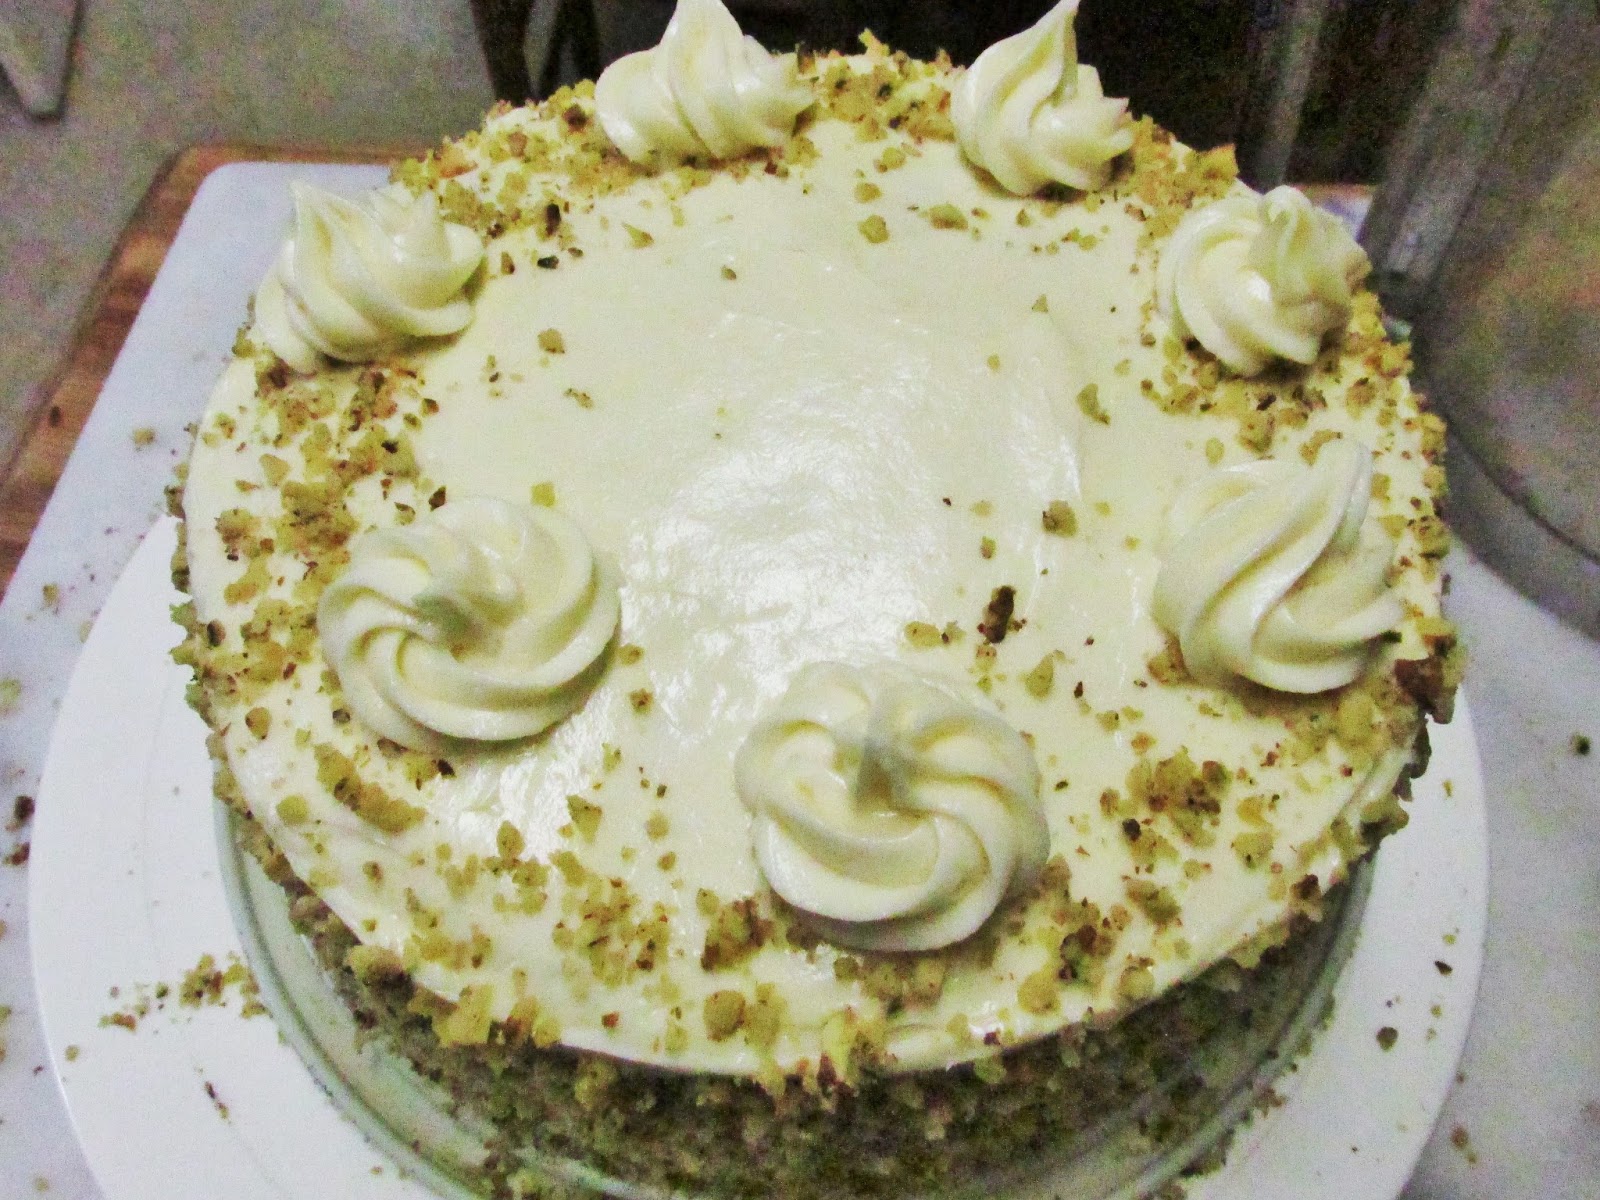
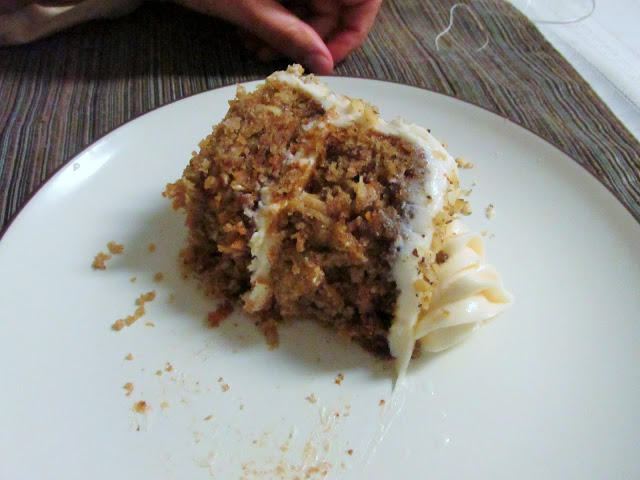
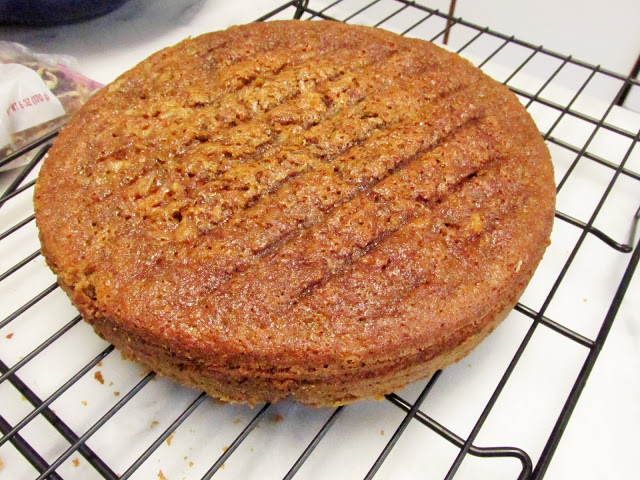
This is my first crack at gluten free, and it went surprisingly well. This cake is moist, soft, and airy. It rose perfectly in the oven, and didn't cave in when it cooled. You can't even tell it isn't made with flour! Thanks to Divas Can Cook for the inspiration and main recipe.


Some things I have learned about making baked goods with gluten free "flour":

1. Use double the flavorings: it seems that these nut/rice/bean flours absorb any flavors you add, so add double the vanilla and double the cinnamon. You can also add more sugar. Ramp up the flavors on all levels! Taste your batter before you cook it. It should taste sweet, like a cake.

2. Use a batter with lots of moisture: It is true that oftentimes you can replace the regular flour in a cake recipe with the gluten free type, however, be sure that the recipe you choose has lots of wet ingredients like buttermilk or sour cream and oil (instead of butter) to add fat and richness.

3. Use a rice-flour blend: I just recently learned that bean-based flours can have a grainy consistency or taste gross when used in sweets, so try to get a blend based in rice flour, like King Arthur gluten free, instead of something  like Bob's Red Mill.

4. Do not overbake: If anything, underbake. As soon as the cake no longer has any giggle in it, take it out and put the pan directly into the freezer for 15 minutes to cool it directly. Gluten free things seem to dry out really quickly if you leave them in the oven too long.


Ingredients:

1 cup white sugar
½ cup brown sugar, packed
1 cup canola oil or vegetable oil
3 large eggs
1 tablespoon vanilla extract
2 cups gluten-free flour
1½ teaspoons baking powder
1 teaspoon baking soda
½ teaspoon salt
1 tablespoon cinnamon
½ cup buttermilk (substitute 1 tsp lemon juice with milk to add up to 1/2 cup)
2.5 cups carrots, finely shredded
1/2 cup apple sauce
½ cup sweetened desiccated coconut flakes


Preheat your oven to 325F. Prepare 2 8-inch cake pans by buttering and flouring the bottom and sides. You may also find it convenient to add in parchment circles (also buttered and floured) to allow easier removal of the cakes.

Combine the sugar and oil in a large bowl. Add the eggs and vanilla, and whisk until well combined and bubbly.

In a separate bowl, sift the flour, baking powder, baking soda, cinnamon, and salt.

In two additions, mix dry ingredients into the sugar and egg mixture, alternating with buttermilk. Do not over mix, just blend until fully combined--it shouldn't be perfect.

Next, pour in your carrots, apple, and coconut. Fold in gently. Divide batter between the pans and bake for 20-30 minutes. Once you hit the 20 minute mark, check every few minutes. Give each pan a gentle shake. Remove the cakes as soon as the batter doesn't giggle. Place the pans in the freezer immediately, for about 15 minutes to stop then cooking process.

Remove from pans and place on cooling racks until fully room temperature.


Cream Cheese Frosting Recipe:

16 oz cream cheese, room temperature
1 stick unsalted butter, room temperature
3-5 cups powdered sugar (depends on how sweet you want it)
1 teaspoon vanilla extract
1/2 tsp. lemon juice
1 cups pecans, pulsed in food processor until small bits


Beat the butter and cream cheese until smooth. Add in your powdered sugar 1 cup at a time until smooth and thick. Add in lemon juice and vanilla. Continue beating, and add in more sugar if you want it thicker.

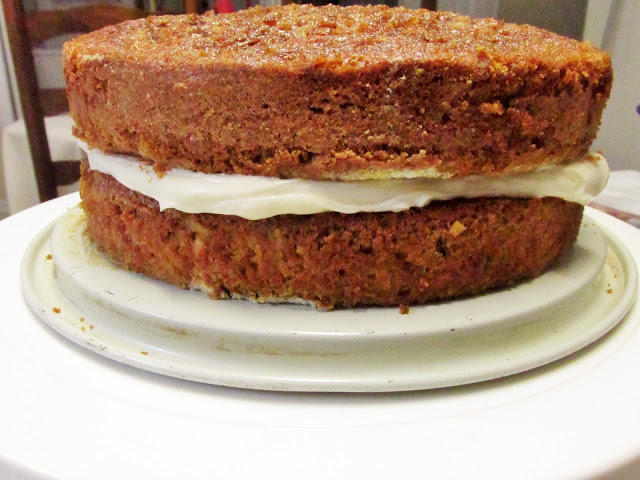
To frost the cake: place the first layer on your cake tray. Scoop up a nice, large spatula-full of icing (about 1 cup) and spread carefully over the cake, being sure not to pull up crumbs. Keep this layer thick. Carefully pick up your second cake layer and lay it on top of the icing, press down gently to even the top.


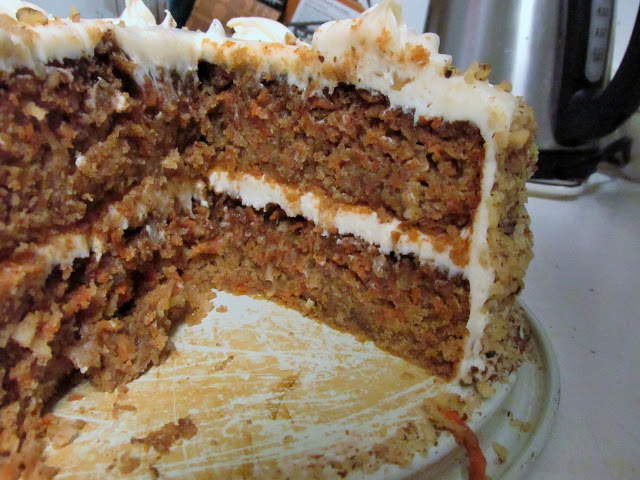
Use another 2 cups of icing to carefully cover the top with your cake spatula, allowing frosting to overhang the sides. Lastly, slather frosting over the sides of the cake until fully covered. Take handfuls of pecans and press them all around the sides of your cake. Use any remaining frosting to garnish the top with some swirls. Refrigerate to firm up. Let this sit on the counter for about 20 minutes before serving.


Wednesday, June 24, 2015

The Best Sweet Pastry


I've been making pies for a while...I'm always looking for the most flavor-packed, scrumptious pastry recipe. If you thought that your pie crust is just a vessel for the filling, think again! That stuff you buy in the frozen food section is truly terrible. It's bland, crumbly and flat. Never buy it.

This recipe, adapted from Jamie Oliver, is the perfect blend of sweet and flaky; it tastes almost like shortbread. This one is actually worth its weight in butter.


Ingredients:
-17 oz. flour
-3.5 oz. icing sugar
-9 oz. cold unsalted butter, cubed
-zest of 1 lemon or orange (or a vanilla bean)
-2 large eggs, beaten
-splash of milk
-pinch of salt

Sift together the flour and sugar in a large, wide bowl, or on a wide counter top. Next, sprinkle over the cubes of butter. Using a pastry cutter or two knives, work the butter into the flour mixture until it becomes crumbly, with pea-sized lumps. Don't spend too long on this part, because you don't want the butter to start to melt. Next, add in your eggs, milk, salt and lemon zest, mixing with a fork. When the mixture sticks together when you press two fingers into it, it is ready to wrap up. Use a bit more milk if you need it.

Lay out a few layers of plastic wrap; pour your dough into it, and then wrap the edges around it, pressing the dough into a ball. Flatten the ball slightly, and place the dough in the fridge for about 2 hours.

Once ready to make your pie, preheat the oven to 400F. Take the dough from the fridge and divide it into two sections, one slightly larger (this will be the bottom crust). Put the rest of the dough back into the fridge until you are ready for the top section. Roll out your dough for the bottom, using some flour to prevent sticking. Lay the dough in your pie dish.

Next, take a square of wax or parchment paper and crumple it up in your hands, then spread it out flat again and lay it in your pie dish. Pour in a few cups of dry rice. This will prevent the edges of the crust from sliding into the middle.

Prebake for about 10 minutes with the rice, remove it and the paper, and then bake for another 3-5 minutes.

Continue with your pie filling after that. Brush some milk or egg wash over the top of your pie before baking.


Tuesday, May 26, 2015

Chocolate Strawberry Tart (Gluten Free)


Here's a delicious summer dessert that also doubles as a great use for those strawberries you pick at the farm!


Ingredients for crust:

-2 1/2 cups of sweetened, desiccated coconut
-1/4 cup of Dutch process cocoa powder
-1/2 cup of coconut oil, melted

Preheat oven to 350F.

Combine the cocoa and coconut in a food processor. Blend until fine. Slowly drizzle in the coconut oil until you've got a nice thick consistency. Press into a pie plate. Bake in oven for 10-15 minutes, until it smells toasty, but not burned! Set aside and cool.


Ingredients for filling:

-10 ounces of heavy cream
-5 ounces of bittersweet (60% cocoa) chocolate
-8 ounces of semi sweet chocolate
-1 tsp vanilla, or of a rich liquor (like Kahlua or Creme de Cacao)
-16 strawberries of similar size, green parts discarded, washed and dried completely

Chop the chocolate and put it in a bowl.

Place the cream in a saucepan over medium heat. Heat until it begins to bubble, then pour over your chocolate. Let it sit for about 2 minutes before stirring it together gently with a spatula until evenly blended. Stir in your vanilla or liquor. Pour into the pie crust.

Finally, press the strawberries into your tart. Place it in the fridge for about 2 hours, or until the ganache is firm. Before serving, set it out for about 30 minutes, to soften the coconut oil in the crust and make it easier to cut.


Friday, May 15, 2015

Homemade General Tso's

A favorite Chinese food takeout dish...I set out to discover whether or not it was possible to create this delicious food without MSG (or any other mysterious ingredients) in a home kitchen. After a few tries, I believe I have been successful! It also has this richness which the normal stuff just cannot match.

Serve it with some delicious Botan rice(and maybe a vegetable or two) and there you have it!


Ingredients for sauce:

1 1/2 teaspoons of fresh minced garlic
3/4 cup sugar

1/3 cup molasses
1/2 cup soy sauce
2 tbsp rice vinegar
1/4 cup sweet white wine or sake

1  cup hot broth or stock
1-2 tsp chili pepper flakes (depending on how spicy you like it)
2 tsp. Sriracha sauce
1/2 tsp. cayenne pepper
1/2 tsp. white pepper
1/4 cup cornstarch, blended with 1/4 cup water
Chopped scallions (optional)

Ingredients for chicken:

2 lbs boneless chicken thighs, excess fat removed, cut into bite-sized chunks (can use steak tips or pork for this, too)
1/4 cup soy sauce
1/2 teaspoon white pepper (it's packed full of umami flavor! Don't skip)
1 egg
1/2 cup cornstarch


Vegetable or canola oil (for frying)


Blend the sauce ingredients together, except the cornstarch mixture--keep that separate. Set aside.

Blend your meat ingredients together until fully coated and set aside. Heat about 1/5-2 inches of oil in a pot or high-sided pan over medium-high heat (the deeper the oil, the faster the cook time). Be sure the temperature rises to 375F with a kitchen thermometer. Don't let it get any hotter! 


Begin to add your chicken to the oil in batches, being careful that the pieces don't stick together. Each batch should hold about 6-9 chicken pieces, depending on the size of your pot. Once you add them in, check your thermometer. The temperature will have dropped to about 325-350F. Raise the temperature carefully back up to 375 while the batch is cooking. Once the pieces are a deep, golden brown (about 3-5 minutes), drain on a pan covered in paper towel. Repeat with the rest of the chicken. 


Once all of the meat is cooked, take your pot of hot oil off of the heat to cool down. Then, preheat a wok or non-stick pan to medium-high. Pour in your sauce and bring it to a simmer. Pour in about half of your cornstarch mixture and cook down until it begins to thicken. If you want it thicker, add the rest of your cornstarch mixture. Once you've got a thick, but still pour-able, sauce, add your fried chicken into the wok and toss. Sprinkle in chopped scallions to garnish.

Serve with rice and (maybe) some broccoli!

(My version with beef)


Sunday, May 3, 2015

Kale Salad with Spiced, Roasted Chickpeas and Caesar Dressing

 Looking for a new, interesting salad for this summer? Are you always finding yourself disappointed by soggy lettuce and are afraid to bring a salad to a summer picnic? Well, fear no more...

I have been enjoying sauteed kale for the past year or so, usually with lemon and garlic. It was only recently that I discovered kale is much more sturdy, and much less disappointingly soggy, than lettuce, and that it can be tamed to taste like lettuce in a salad (not crunchy and chewy, like you'd think). The trick is to "marinate" the kale and be sure to cut it properly.

The chickpeas are almost like a crouton, but they are bread-free and a little something different.


Ingredients for Chickpeas:
- 1 can chickpeas, strained, husks removed (press on each one with your thumb), and patted dry
-1 tbsp. olive oil
-1/2 tsp. smoked paprika
-1/2 tsp. chipotle chili powder
-1/4 tsp. garlic powder
-1/4 tsp. onion powder
-1/4 tsp. ground coriander
-1/2 tsp. salt
-1/4 tsp. pepper

Preheat oven to 375F. Combine chickpeas with all other ingredients. Removing the husks is optional, but it will result in a crispier final product.

Place on a baking sheet covered with foil or parchment paper. Bake for 30 minutes, until browned, toasty, and crispy, shaking the pan every once in a while. While those are cooking away...

Ingredients for Caesar dressing:
-1/2 cup mayonnaise
-2 tbsp. olive oil
-1/4 cup fresh lemon juice
-1/4 cup grated Parmesan cheese
-1 garlic clove, grated
-1 tsp. Worcestershire sauce
-1/2 tsp. white vinegar
-1/4 tsp. smoked paprika
-1/4 tsp. chipotle chili powder
-ground black pepper
-salt

Combine ingredients. Add salt to taste. Let sit for about 30 minutes at room temperature to allow the garlic to infuse. And lastly,

Ingredients for salad:
-1 large bowl of kale leaves, thick stems removed, chopped into bite-sized pieces (do not neglect this part)
-1 lemon
-olive oil
-salt
-1 medium carrot, shaved into thin strips

Once you have your bowl of kale lettuce all prepped--NO STEMS ALLOWED!--drizzle over the juice of half of the lemon, a couple of teaspoons' worth of olive oil, and a sprinkle of salt. Toss until well coated and set aside until your chickpeas are cooled completely and you are ready to serve (kale will last overnight in the fridge like this, too (unlike lettuce or spinach!). The lemon breaks down some of the fibrous quality of the kale, and makes it super tender). 

When ready to serve, shave over the carrot. Toss in the amount of dressing you like, and serve with grated Parmesan and the chickpeas on top.


Wednesday, April 22, 2015

Murgh Musallam (A Curry)

If you're an Indian food fan, you know it's tough to make it at home...really tough. There is just a certain amount of umami that it is impossible to purvey without a tandoor and some Hindu magic.

But....

This one is pretty good. Yes, you need a bunch of spices, but if you head over to your nearest Indian market, you can find them for pretty cheap. Keep them in zip-lock bags, in a Tupperware container, in a dark cabinet--yes, that sounds like Storage Inception, but trust me. It's a necessary step to keep the flavor (and the powerful smell) from drifting out of the pantry. Try to get whole spices rather than ground ones. The whole ones last a few years. Ground spices start to lose their flavor and "pizzazz" over the course of a few months. 


Ingredients for Chicken Marinade

5 cloves garlic, minced
2 tbsp grated fresh ginger
2 tsp. salt
1 tsp. fresh pepper
1/2 cup curd or plain yogurt
1 tbsp lemon juice
1/2 onion chopped
1 tsp. garam masala
1 tsp. turmeric powder
1 tsp. coriander powder
6 chicken thighs, on the bone

Ingredients for Sauce

1/4 cup butter
1.5 large onions (finely chopped)
2 tsp turmeric powder
2 bay leaves
4 whole cloves
4 green cardamom pods
2 tsp roasted coriander powder
-2 tsp. salt
1 tsp red chili powder
1 tsp cumin seeds
1/2 lb crushed tomatoes
1/2 cup Greek yogurt
1 1/4 cups water

3 tbsp chopped coriander (cilantro) leaves
1/2 tsp saffron strands
1 tsp garam masala powder


1 Day Ahead:

Combine chicken and marinade in a zip-lock bag or Tupperware container. Shake really well until well covered. Let sit in the fridge for 24 hours. 


To Cook:

-Preheat the oven to 400F.

-Pan sear the chicken (and any remaining marinade) in a large, tall-sided pan or Dutch oven over medium-high heat with some olive oil. Brown on all sides and remove from pan. 


-Add butter to the same pan. Once melted and bubbling, add 1 of the chopped onions, turmeric, bay leaves, cloves, cardamom, coriander, and SALT. Saute until softened and golden, about 7 minutes. 


-Add the tomatoes, Greek yogurt, and chili powder to the pan.


-Mash or blend the last bit of onion with the cumin seeds until it forms a paste. Rub this all over the chicken pieces and lay them in the sauce. 


-Pour over the water, cover with a lid, and place in the oven for about 45 minutes, or until the chicken reaches an internal temperature of 165F. 


-Sprinkle over the cilantro, saffron, and garam masala before serving.

-Serve chicken with lots of sauce, basmati rice, naan bread, and some Bollywood!


Sunday, April 5, 2015

Dark Chocolate Mint Cake

I made this amazing cake again today, and it is so delicious! I decided to post the recipe again here and incorporate the pictures from this time, as well as a few revisions. 


Dark Chocolate Mint Cake (adapted from Smitten Kitchen's Chocolate Butter Cake): 
Makes one 3 layered 9 inch cake 

3 cups cake flour
3 cups sugar
1 1/2 cups unsweetened cocoa powder 
3 teaspoons baking soda
3/4 teaspoon salt
3 sticks (12 ounces) unsalted butter, at room temperature
1 1/2 cups buttermilk
3 eggs 
1 1/2 cups of  cooled coffee, minus 2 teaspoons
2 tsp. peppermint extract
1 cup Andes Mints, crushed into small pieces (plus more for decorating)

1. Preheat the oven to 350 degrees F. Butter three 9 inch, round cake pans (or 3 8 inch square pans). Line the bottoms with parchment or waxed paper and butter the paper.

2. In a large mixer bowl, combine the flour, sugar, cocoa, baking soda, and salt. With the electric mixer on low speed, blend for about 30 seconds. Add the butter and buttermilk and blend on low until moistened. Raise the speed to medium and beat until light and fluffy, 2 to 3 minutes.

3. Whisk the eggs, coffee, and peppermint, and add to the batter in 3 additions, scraping down the sides of the bowl and beating only until blended after each addition. Stir in the Andes Mint pieces. Divide the batter among the three prepared pans; each pan will take about 3 1/4 cups of batter. 

4. Bake for 38 to 40 minutes, or until a cake tester or wooden toothpick inserted in the center comes out clean. Carefully turn them out onto wire racks and allow to cool completely. Remove the paper liners only when they are cool.


While the cakes are cooling (or while they are cooking) work on your frosting.


Swiss Buttercream Frosting Recipe: 
Base to which you add the ingredients listed on the cake recipe of  your choice

2 cups sugar
8 large egg whites
52 tablespoons butter, softened (6 sticks plus 4 tablespoons)
2 teaspoons vanilla extract

1. Whisk egg whites and sugar together in a big metal bowl over a pot of simmering water. Whisk occasionally until you can’t feel the sugar granules when you rub the mixture between your fingers.

2. Transfer mixture into the mixer and whip until it turns white and about doubles in size, and looks like marshmallow fluff, giving you pretty stiff peaks. (Here’s a tip: when you transfer to the mixer, make sure you wipe the condensation off the bottom of the bowl so that no water gets into the egg whites. This can keep them from whipping up properly.) 


3. Finally, add the butter a stick at a time and blend forever. It will take a good few minutes of whipping for it  to start looking like frosting. At first it will look  curdled, once you have added in all of the butter, but never fear!!! Keep on whipping for a good 5-7 minutes and it should all come together looking the texture of whipped butter or mayonnaise. Add the flavorings you need...


 (The ugly curdled-looking stage)


(The pretty final product!)


Filling:
-1/3 recipe of Swiss Buttercream frosting with 1 teaspoon of peppermint extract and green food coloring to make a light green/minty color.


Frosting:
-2/3 (the rest of the recipe) of Swiss Buttercream frosting with 2 squares of Baker's dark chocolate (melted and cooled slightly).


Putting it together:

1. When cool--absolutely room temperature, it's time to put the layers together. 

2.Set your first layer of cake on your cake stand--if you've got rounded tops, you may want to even those out with a good bread knife. Spread your mint Swiss Buttercream filling onto the first layer, being sure to keep a half inch border around the cake free of frosting. This way, when you press the layers down, icing won't spill out the sides. 

3.Place on your second layer of cake and press down. Make sure it's even on top. Fill this layer and add on the final layer of  cake and press down to make the top as even as possible.

4. Finally, it is time to frost the cake using your Chocolate Swiss Buttercream Frosting. Here is a video that explains the best way to frost a cake. It would be too difficult for me to describe in writing. You don't have to make your cake super smooth, like this person does, but the basic method of frosting the cake is really easy to follow.

5. Press crumbled Andes Mint pieces around the sides of the cake (an optional touch!).