Showing posts with label Dessert. Show all posts

Wednesday, June 24, 2015

The Best Sweet Pastry


I've been making pies for a while...I'm always looking for the most flavor-packed, scrumptious pastry recipe. If you thought that your pie crust is just a vessel for the filling, think again! That stuff you buy in the frozen food section is truly terrible. It's bland, crumbly and flat. Never buy it.

This recipe, adapted from Jamie Oliver, is the perfect blend of sweet and flaky; it tastes almost like shortbread. This one is actually worth its weight in butter.


Ingredients:
-17 oz. flour
-3.5 oz. icing sugar
-9 oz. cold unsalted butter, cubed
-zest of 1 lemon or orange (or a vanilla bean)
-2 large eggs, beaten
-splash of milk
-pinch of salt

Sift together the flour and sugar in a large, wide bowl, or on a wide counter top. Next, sprinkle over the cubes of butter. Using a pastry cutter or two knives, work the butter into the flour mixture until it becomes crumbly, with pea-sized lumps. Don't spend too long on this part, because you don't want the butter to start to melt. Next, add in your eggs, milk, salt and lemon zest, mixing with a fork. When the mixture sticks together when you press two fingers into it, it is ready to wrap up. Use a bit more milk if you need it.

Lay out a few layers of plastic wrap; pour your dough into it, and then wrap the edges around it, pressing the dough into a ball. Flatten the ball slightly, and place the dough in the fridge for about 2 hours.

Once ready to make your pie, preheat the oven to 400F. Take the dough from the fridge and divide it into two sections, one slightly larger (this will be the bottom crust). Put the rest of the dough back into the fridge until you are ready for the top section. Roll out your dough for the bottom, using some flour to prevent sticking. Lay the dough in your pie dish.

Next, take a square of wax or parchment paper and crumple it up in your hands, then spread it out flat again and lay it in your pie dish. Pour in a few cups of dry rice. This will prevent the edges of the crust from sliding into the middle.

Prebake for about 10 minutes with the rice, remove it and the paper, and then bake for another 3-5 minutes.

Continue with your pie filling after that. Brush some milk or egg wash over the top of your pie before baking.


Tuesday, May 26, 2015

Chocolate Strawberry Tart (Gluten Free)


Here's a delicious summer dessert that also doubles as a great use for those strawberries you pick at the farm!


Ingredients for crust:

-2 1/2 cups of sweetened, desiccated coconut
-1/4 cup of Dutch process cocoa powder
-1/2 cup of coconut oil, melted

Preheat oven to 350F.

Combine the cocoa and coconut in a food processor. Blend until fine. Slowly drizzle in the coconut oil until you've got a nice thick consistency. Press into a pie plate. Bake in oven for 10-15 minutes, until it smells toasty, but not burned! Set aside and cool.


Ingredients for filling:

-10 ounces of heavy cream
-5 ounces of bittersweet (60% cocoa) chocolate
-8 ounces of semi sweet chocolate
-1 tsp vanilla, or of a rich liquor (like Kahlua or Creme de Cacao)
-16 strawberries of similar size, green parts discarded, washed and dried completely

Chop the chocolate and put it in a bowl.

Place the cream in a saucepan over medium heat. Heat until it begins to bubble, then pour over your chocolate. Let it sit for about 2 minutes before stirring it together gently with a spatula until evenly blended. Stir in your vanilla or liquor. Pour into the pie crust.

Finally, press the strawberries into your tart. Place it in the fridge for about 2 hours, or until the ganache is firm. Before serving, set it out for about 30 minutes, to soften the coconut oil in the crust and make it easier to cut.


Sunday, April 5, 2015

Dark Chocolate Mint Cake

I made this amazing cake again today, and it is so delicious! I decided to post the recipe again here and incorporate the pictures from this time, as well as a few revisions. 


Dark Chocolate Mint Cake (adapted from Smitten Kitchen's Chocolate Butter Cake): 
Makes one 3 layered 9 inch cake 

3 cups cake flour
3 cups sugar
1 1/2 cups unsweetened cocoa powder 
3 teaspoons baking soda
3/4 teaspoon salt
3 sticks (12 ounces) unsalted butter, at room temperature
1 1/2 cups buttermilk
3 eggs 
1 1/2 cups of  cooled coffee, minus 2 teaspoons
2 tsp. peppermint extract
1 cup Andes Mints, crushed into small pieces (plus more for decorating)

1. Preheat the oven to 350 degrees F. Butter three 9 inch, round cake pans (or 3 8 inch square pans). Line the bottoms with parchment or waxed paper and butter the paper.

2. In a large mixer bowl, combine the flour, sugar, cocoa, baking soda, and salt. With the electric mixer on low speed, blend for about 30 seconds. Add the butter and buttermilk and blend on low until moistened. Raise the speed to medium and beat until light and fluffy, 2 to 3 minutes.

3. Whisk the eggs, coffee, and peppermint, and add to the batter in 3 additions, scraping down the sides of the bowl and beating only until blended after each addition. Stir in the Andes Mint pieces. Divide the batter among the three prepared pans; each pan will take about 3 1/4 cups of batter. 

4. Bake for 38 to 40 minutes, or until a cake tester or wooden toothpick inserted in the center comes out clean. Carefully turn them out onto wire racks and allow to cool completely. Remove the paper liners only when they are cool.


While the cakes are cooling (or while they are cooking) work on your frosting.


Swiss Buttercream Frosting Recipe: 
Base to which you add the ingredients listed on the cake recipe of  your choice

2 cups sugar
8 large egg whites
52 tablespoons butter, softened (6 sticks plus 4 tablespoons)
2 teaspoons vanilla extract

1. Whisk egg whites and sugar together in a big metal bowl over a pot of simmering water. Whisk occasionally until you can’t feel the sugar granules when you rub the mixture between your fingers.

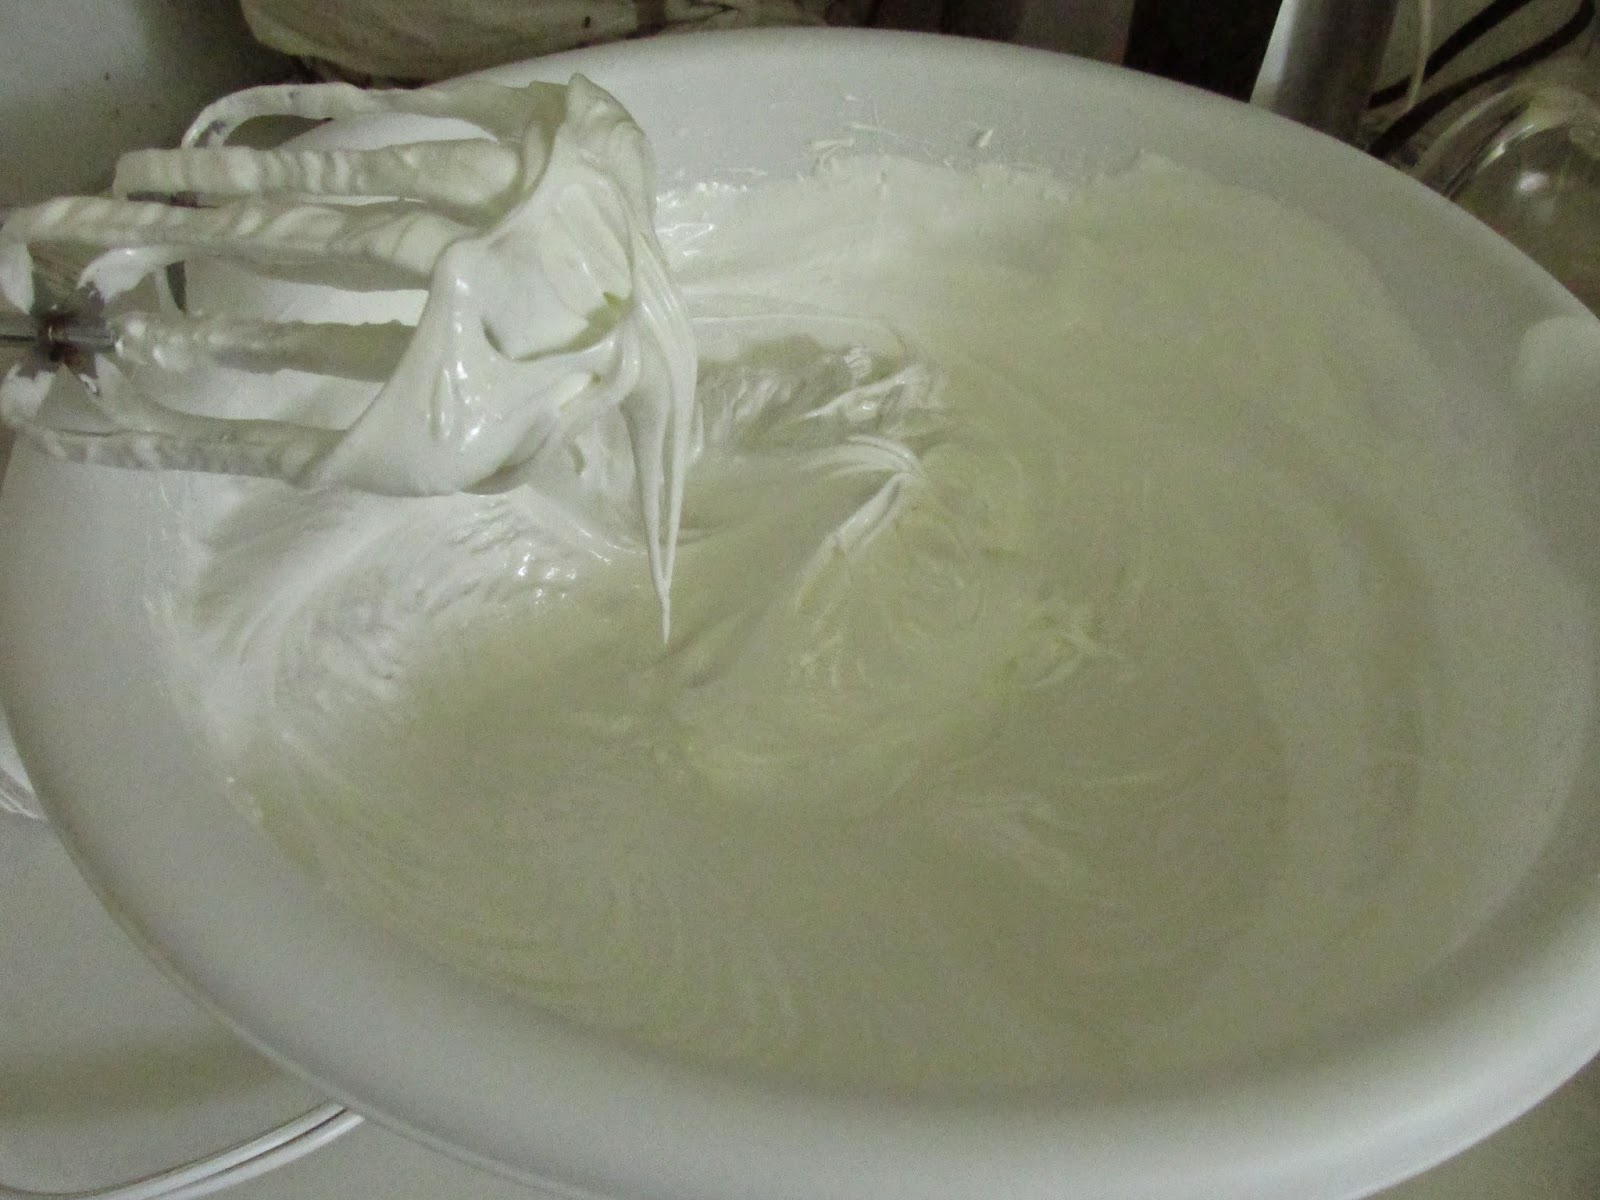
2. Transfer mixture into the mixer and whip until it turns white and about doubles in size, and looks like marshmallow fluff, giving you pretty stiff peaks. (Here’s a tip: when you transfer to the mixer, make sure you wipe the condensation off the bottom of the bowl so that no water gets into the egg whites. This can keep them from whipping up properly.) 


3. Finally, add the butter a stick at a time and blend forever. It will take a good few minutes of whipping for it  to start looking like frosting. At first it will look  curdled, once you have added in all of the butter, but never fear!!! Keep on whipping for a good 5-7 minutes and it should all come together looking the texture of whipped butter or mayonnaise. Add the flavorings you need...


 (The ugly curdled-looking stage)


(The pretty final product!)


Filling:
-1/3 recipe of Swiss Buttercream frosting with 1 teaspoon of peppermint extract and green food coloring to make a light green/minty color.


Frosting:
-2/3 (the rest of the recipe) of Swiss Buttercream frosting with 2 squares of Baker's dark chocolate (melted and cooled slightly).


Putting it together:

1. When cool--absolutely room temperature, it's time to put the layers together. 

2.Set your first layer of cake on your cake stand--if you've got rounded tops, you may want to even those out with a good bread knife. Spread your mint Swiss Buttercream filling onto the first layer, being sure to keep a half inch border around the cake free of frosting. This way, when you press the layers down, icing won't spill out the sides. 

3.Place on your second layer of cake and press down. Make sure it's even on top. Fill this layer and add on the final layer of  cake and press down to make the top as even as possible.

4. Finally, it is time to frost the cake using your Chocolate Swiss Buttercream Frosting. Here is a video that explains the best way to frost a cake. It would be too difficult for me to describe in writing. You don't have to make your cake super smooth, like this person does, but the basic method of frosting the cake is really easy to follow.

5. Press crumbled Andes Mint pieces around the sides of the cake (an optional touch!). 


Saturday, October 4, 2014

Chocolate Banana "Ice Cream"

This stuff is really good. It's got about 20g carbs because of the banana, but it's much more worth the carbs than regular 'ole splenda-infused ice cream. It's got a lot more nutrients than any other dessert you could think of.


Ingredients:

-1 frozen banana, chopped into chunks
-1 heaping teaspoon cocoa powder
-1 heaping teaspoon peanut butter
-1 packet stevia
-a sprinkle of toppings

Combine all ingredients (except toppings) in a food processor. Blend until smooth--add a drop of milk or water if it gets too clumpy. Sprinkle with toppings, and serve!

I always keep some chopped bananas in the freezer just for this occasion. It's really quick, and it's delicious!


Wednesday, July 16, 2014

Coconut Cream Chocolate Mousse (Low Carb; Vegan)


I recently started a low carb diet, so I am always looking for ways I can cheat!! This mousse tastes just as light and fluffy and chocolatey as the normal stuff-it's just got a hint of coconut flavor. You'll enjoy it, to be sure.


Ingredients:

-1 can unsweetened, full fat coconut milk (the brand below or Thai Kitchen are good)
-1 Tbsp. cocoa powder or ground cacao nibs
-1/2 tsp. vanilla
-3/4 tsp. stevia or other sweetener
-fresh berries (optional)


First, make sure you place that can of coconut milk in the fridge for at least 8 hours. The cream sits on top of the coconut water, so the longer it refrigerates, the easier it will be to scoop away the cream. Also, if you don't refrigerate it before you add in your cocoa and such, it will get all grainy when it solidifies in the fridge. Just trust me-spend the extra time to let it harden.


Once fully refrigerated, open your can and scoop the cream into a bowl. Be sure you don't get any of the water in there! You can save that for later and add it to another recipe, or just toss it.

Next, whip your cream with a whisk to make it fluffy.


Stir in your cocoa, vanilla, and stevia.


Put it back in the refrigerator until ready to serve.


You can pipe it into a serving dish like this to make it fancy....


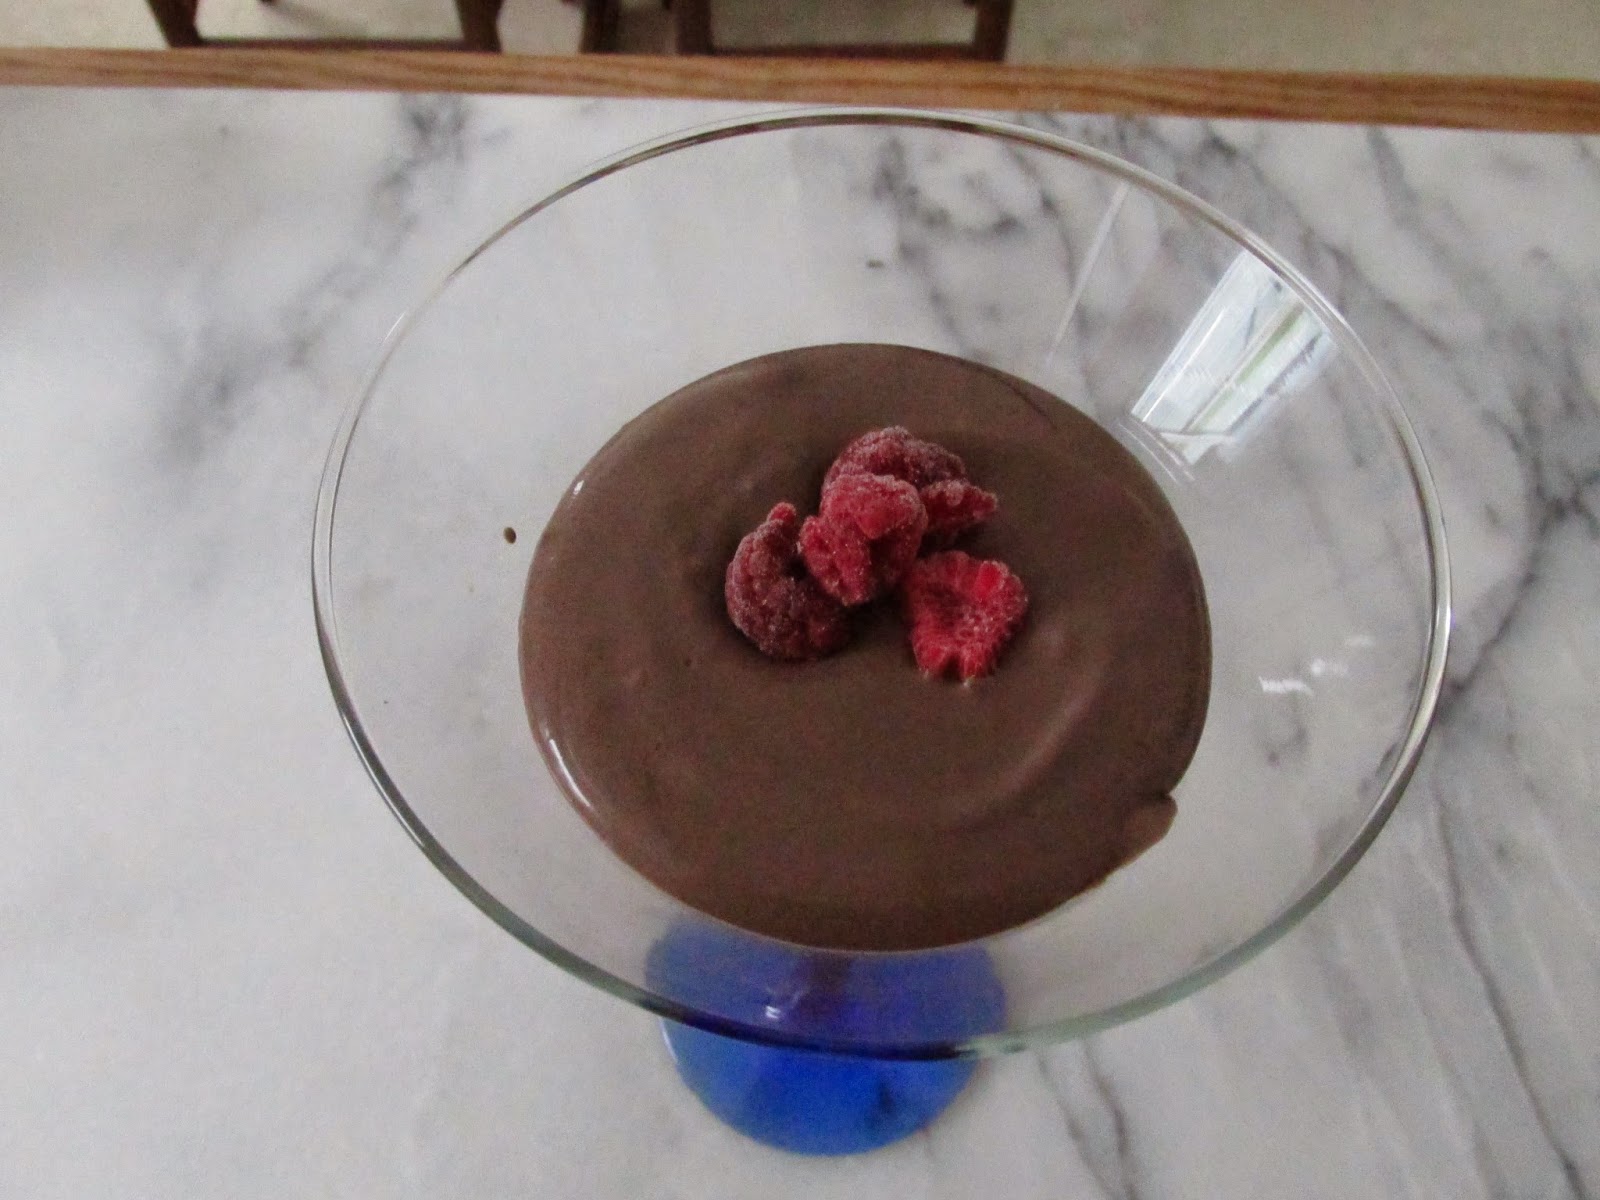
Or, you can serve it in a martini glass, like me!


Tuesday, July 15, 2014

Amaretto White Chocolate Cheesecake

 I saw this recipe from Cozy, Country Living and I was inspired to make cheesecake. My recipe below is an adaptation, based on the flavors that we like around here.


Normally, my cheesecakes turn out real bad, but this is the second recipe I've come up with this summer that has been a success! I am truly pleased. I hope you enjoy this dessert as much as my family did. I got some really good pictures, too, as I was in my dad's kitchen and there is a ton of great natural lighting.


Ingredients for Crust:

-1.5 bags of graham crackers (about 2 cups ground)
-1/2 cup raw, unsalted almonds
-1/4 cup brown sugar
-1/2 cup unsalted butter, melted.
-1 Tbsp. Amaretto (sub. 1 tsp. almond extract)
-1/4 tsp. salt

Get out your 9 inch round springform pan and grease it well with a knob of butter. Preheat your oven to 350F.

In a food processor, blend up your almonds until finely ground. Add graham crackers and grind those up too. Add in the rest of the ingredients and pulse until fully combined.

Dump all the amazing-smelling goodness into your pan and spread it all around, being sure to press it in about 1.5 inches up the sides (to keep your cheesecake packed tightly inside!). Set aside.

Ingredients for Filling:

- 2 packages of full-fat cream cheese (8 oz packages)
- 2 packages of greek yogurt cream cheese (or just sub. regular)
- 1 1/2 cups granulated white sugar
- 4 Tbsp. Amaretto (sub. 4 tsp. almond extract)
- 1 tsp. almond extract
- 1 tsp. vanilla extract
- 1/4 tsp. salt
- 3 oz. finely chopped white chocolate (Ghirardelli or Baker's)
- 1/4 cup almonds, chopped up in food processor

Beat up your cream cheese and sugar with an electric mixer until light and fluffy. Add in the eggs one at a time, making sure to scrape down the sides of the bowl after each addition (or else you will have a lumpy filling!). Add in all of the rest of the ingredients and blend until fully combined.

Pour into your crust and place in the oven for about 60-80 minutes. It's ready to come out when the edges and top are firm (sometimes with a few cracks), but there is still a little "giggle" in the middle if you wiggle the pan.

Run a knife around the edge of the pan so the crust doesn't stick. Cool the cheesecake on a rack, and when it is completely room temperature (about 2 hours), place it in the fridge overnight or for at least 6 hours to firm up all the way.

Topping:

- 1 1/2 cups whipping cream
- 2 Tbsp. powdered sugar
- 1/3 cup of slivered or sliced almonds (whichever you prefer)
- 1/4 cup shaved white chocolate

Whip your cream to stiff peaks. Sprinkle in the powdered sugar and combine.

Take the top off of the springform pan. Spread the cream over the top of your completely cold cheesecake. Sprinkle over your almonds and finish with a grating of white chocolate.

Serve!


Monday, May 5, 2014

Easy No-Bake Turtle Cheesecake


On Sunday I was trying to think of a dessert to bring to a poker night at a friend's  house. It needed to be something I could throw together between church and 5pm. At first cheesecake was entirely off the table, but then I thought up an idea.

This is really fantastic in so many ways....first, it's really fast (none of that horrible water-bath in the oven nonsense), second, it doesn't get a chance to burn, sink, or curdle because it's not baked, and third, it's not made with Cool Whip!!!

It set really well even though it's not baked. It's softer than a cooked cheesecake, firmer than a pudding, but super rich and smooth. It will hold its shape when cut--making life so much easier for those of us who are really bad at cutting cakes and pies.

Overall, this is the best and yummiest no-bake I have ever made. Enjoy.

Ingredients for Crust:

-1 sleeve of graham crackers (9 crackers)
-1 cup of pecans
-1.5 sticks of butter (11 tbsp.)

In a food processor, blend up the cracker and pecans until finely ground. Melt the butter in the microwave and add to the crumbs. Pulse until fully combined.

Pour into a pie dish (this was easiest for me; you can also try a spring-form pan and remove the outer edge to serve), and press the crumbs all around and up the sides so it's all smooth and even. Cover with plastic wrap and place in the fridge for half an hour.

Ingredients for Filling:

-2 8 oz. packages of cream cheese (not low-fat!!!), at room temperature
-1 14 oz. can of condensed milk (also not low-fat...come on guys, dessert is meant to be like this)
-zest of one lemon
-1/4 cup of fresh lemon juice
-1 1/2 tsp. caramel flavoring
-1/2 tsp. vanilla extract

Beat the cream cheese until smooth with an electric mixer. Slowly drizzle in the condensed milk and beat until fully combined, scraping down the sides. Add in the lemon zest and juice, then the flavorings. Pour into the graham cracker crust and refrigerate for at least 1.5 hours. Then, sprinkle more pecans on the top, along with some chocolate chips, and a cross-hatched drizzle of chocolate syrup and caramel syrup (I didn't have any this time).

Serve!


Monday, April 28, 2014

Bourbon Pecan Tart

I love pecan pie, but this is really something new, from Jamie Oliver...It's quite "bourbony" and so addictive. The pastry is also very unique--with orange zest to add flavor. If you afford to buy lots of pecans (haha), this should be your go-to pie!


Sweet Pastry:

2 cups of all purpose flour
1/3 cup icing sugar
3/4 cup butter, cold, diced
zest of 1 orange
1 egg
a splash of milk

Combine the flour and sugar by hand or in a food processor. Sprinkle in the butter and zest, and combine with a pastry cutter or pulse until in pea-sized crumbs. Add the egg to the mixture, and a splash of milk--I say a splash because depending on your flour and the temperature and humidity, you will need more or less.

Continue blending until it all comes together into a ball. Flatten slightly and wrap in cling wrap. Refrigerate for at least 1 hour.

Preheat your oven to 350F and Roll out your dough to about 1/4 inch thick. Lightly oil a pie plate and place the dough inside, cutting off any excess and pressing down the edges.

Scrunch up a square of parchment paper, and then unwrap and use it to line your pastry. Fill in right up to the top with rice. This prevents the pastry form sinking into the pan. Place in the oven, and cook for 10 minutes. Remove the paper and rice, and cook again for about 10 minutes, until golden brown. Cool completely.


Filling:

15 oz. pecan halves
3 large eggs
6 oz. sugar (1/2 cup plus 1 tbsp.)
1 tsp. cinnamon
1/2 cup butter, melted
1/2 cup molasses
1/4 bourbon cup whiskey

Preheat oven to 350F.

Bash up half of your pecans in a zip-lock bag with a rolling pin.

Whisk together the eggs, sugar and cinnamon. Add in the bashed pecans and mix until completely blended.

Add the molasses, melted butter, and whiskey, and fold in the halved pecans.

Pour into the pan and bake for 25-30 minutes. Let cool completely before cutting into the pie (it will be slightly syrupy at the bottom when cooled!).

Delicious with whipped cream or vanilla ice cream.


Wednesday, December 18, 2013

Chocolate Whiskey Cake

In celebration of Christmas, I decided to try something new! Some of you may call it insane, but if you are anything like our friends from church you will find this crazy awesome.


Now, I don't know much about whiskey--I just got the cheap stuff. I am sure that the deliciousness of the cake would be maximized by a better brand.


It may just look like an ordinary chocolate cake, but in reality it is full of layers of deliciousness. This chocolate cake isn't just chocolate skin-deep. It's rich; it's moist and sticky; its pure delight!

1. For the cake:

-3 ounces dark chocolate, chopped
-1 1/4 cups water, boiling
-1/4 cup of whiskey
-3 cups sugar
-2 1/2 cups all-purpose flour
-1 1/2 cups unsweetened cocoa powder (not Dutch process)
-2 teaspoons baking soda
-3/4 teaspoon baking powder
-1 1/4 teaspoons table salt
-3 large eggs
-3/4 cup vegetable oil
-1 1/2 cups buttermilk (or instead of buying buttermilk--pour 1tbsp. lemon juice into your measuring jug and fill up to 1 1/2 cup mark with milk--let sit for 5 minutes until buttermilk!)
3/4 teaspoon vanilla

*I used two 10" pans for this recipe, but you can, in fact, do this in three 8" pans--you may just have some batter left over. Use between 3-3 1/2 cups of batter per 8" pan, and 5 1/2-6 cups of batter for a 10" pan.*


Butter your cake pans, and fit with buttered parchment paper circles. Preheat your oven to 300F.

Toss the chocolate in a small bowl and pour over the boiled water and the whiskey. Let stand.

In a medium-sized bowl sift together the sugar, flour, cocoa powder (careful it doesn't get all over you!), baking soda, baking powder, and salt.

In a large bowl with an electric mixer beat eggs until super frothy, pale yellow, and slightly thicker (this should take a few minutes). Slowly add oil, buttermilk, vanilla, and melted chocolate mixture to eggs, beating until combined well--not forever--just until combined.

Stir in the flour mixture by hand until just combined--it may have a few lumps--we like those.

Divide batter between pans and bake in middle of oven until the center no longer giggles when you move the pans---about 1 hour and 10 minutes for a 10" pan.

While the cakes are cooling, let's work on the whiskey syrup!


2. Whiskey Syrup

-1/2 cup of  water
-1/2 cup of brown sugar or natural white sugar
-1/4 cup of whiskey

Combine the water and sugar in a small saucepan over medium-high heat. Stir continually at a simmer until the sugar is fully dissolved. Add in the whiskey. Bring to a gentle, rolling boil (not an "oh-my-gosh-it's-all-over-me" boil) for about 3 minutes--still stirring often--and then take it off the heat. Cool for about 5-7 minutes until it's a syrupy texture.


 Once the syrup is syrupy, drizzle it over your cakes--SLOWLY.  Give it time to sink into the cakes. Don't let it all run down the sides. In fact, leave about a 1/2" perimeter around your cake that has not been touched by the syrup.


Let the cakes keep cooling.

In the meantime, we will whip up some buttercream frosting.Now, for this sort of cake, we actually want something thick, sugary, rich, and delightful--so I am devolving--I am going back to a run-of-the-mill buttercream recipe for  today (shhh...don't tell!!). Those of you who know me and cakes, know that I preach the ways of Swiss buttercream--see these two awesome cake recipes for  more. 

3. Whiskey Buttercream

 -1 cup of butter (two sticks), softened
-3 cups of powdered sugar (plus more)
-3 tbsp. whiskey
-4 tbsp. heavy cream
-3 oz. dark chocolate 

Melt the chocolate in the microwave for 30-second internals, stirring in between, until fully melted. Set aside.

In a medium-large bowl, beat the  butter until it is light and fluffy. Stir in the powdered sugar by hand--so you don't get it all over your kitchen--and then beat it with the mixture until fully combined. Pour in the cream to loosen it up a bit. Now, pour in the whiskey and keep beating until fluffy and light. Finally, pour in the chocolate and gently stir to combine. Taste, and add more whiskey or more powdered sugar as you desire.


Now, you must start putting the cake together. Lay out your first layer on your cake plate or turn table. Stick a few pieces of paper towel around the edges to catch the drips. Now, plop a big dollop of buttercream on top of the layer (half of the mix for a 3-layer cake, or just as much as you need for the 2-layer). Spread it around evenly, being sure to keep a 1" perimeter  free of frosting (or else it will all squish out the sides with you press on the next layer).


Next, place on the next cake layer (and repeat the last steps if you have a 3-layer cake). 


Now, the last thing we have to make is the ganache! Then we can finish up this cake.

4. Chocolate Ganache (No Whiskey Required Here...)

-9 ounces of dark chocolate (60%)
-1 cup of heavy cream

Heat the cream in a small saucepan until it just comes to a boil, stirring constantly, then take it off of the heat and pour it over the chocolate. Let it sit--without stirring--for 1 minute, and then gently, like you are whisking rose petals, whisk the chocolate into the cream (we don't want any air bubbles). 

Set aside to cool for a moment, until it reaches a thick consistency than won't waterfall down the sides of  your cake. 

Lastly, pour the ganache over the cake. Start in the very middle, and pour only a little, and then wait to see how far it spreads. Keep pouring as needed just until it starts to trickle down the sides of the cake. Now, you can take a spatula and spread some more ganache on the sides of the cake (or just leave it messy!).


Refrigerate until the ganache solidifies. Remove the paper towels and present!


Friday, October 18, 2013

Carmelitas: Better Than Brownies


Look at that gooey deliciousness...

This delicious recipe tastes almost like a brownie, except the middle is filled with soft caramel and chocolate. The crumbly oatmeal and cinnamon crust just melts away into each bite. Yes, as your will see, it does require a little patience to let this cool down before you dig in, but good  things come to those who wait!


Ingredients:
1 package of caramel melts (11oz.) (or you can make your own soft caramel-- just use this recipe)
1/2 cup heavy cream
3/4 cup butter, melted
3/4 cup dark brown sugar, packed
1/2 tsp. cinnamon
1 cup flour
1 cup rolled oats
1 teaspoon baking soda
1/2 cup blend of semi-sweet and dark chocolate chips


Preheat oven to 350F. Butter an 8x8 inch square baking pan and set aside.

Mix together melted butter, brown sugar, cinnamon, flour, oats, and baking soda. Pat half of the mixture into the baking pan, and bake in the oven for 10 minutes. While this is happening, combine the caramels and cream in a small saucepan over medium heat until melted into a smooth caramel sauce. Or, if you want to make your own caramel, get started on that now. It will take about half an hour to make, so just be sure you don't forget to take out the crust!

Once the crust is out of the oven, sprinkle your chocolate chips over the top. Pour over your caramel sauce so it evenly covers the crust.


Crumble the remaining oatmeal mixture over the top and return this to the oven and bake it for approximately 15-20 minutes, until edges are golden brown. Remove from the oven and cool completely before serving (I know it's tempting, but if you cut into it while it's still hot it will not hold up at all). You can put it into the fridge for a while to speed things up.


If you want to make a 9x13 amount, simply double the recipe, and also allow more cooking time (mine took about a half hour).


Saturday, August 17, 2013

Mission: Wedding Cake

They all said it was impossible...They all said it was insane....They all said I was suicidal...

But I don't CARE!

I made my own wedding cake! It was a two-tiered two-flavored masterpiece. The bottom was chocolate mint and the top was almond-raspberry, and both were draped in beautiful, Swiss buttercream frosting (none o' that fondant jank). My trial run went smoothly, but took me 4 pounds of butter, 24 eggs, and 7 hours of my day. It was exhausting, but worth it.


So I bet you want to know the non-wedding-cake-sized version. It's a DREAM. I've spent 6 months perfecting my recipe and it is very precious indeed. I hate recipes...but in this case I made an exception and ACTUALLY wrote it all down!

Here are the two separate cake recipes, followed by my frosting recipe.


Chocolate Mint Cake (adapted from Smitten Kitchen's Chocolate Butter Cake):
Makes one 3 layered 9 inch cake

3 cups cake flour
3 cups sugar
1 1/2 cups unsweetened cocoa powder
3 teaspoons baking soda
3/4 teaspoon ground cinnamon
3/4 teaspoon salt
3 sticks (12 ounces) unsalted butter, at room temperature
1 1/2 cups buttermilk
3 eggs
1 1/2 cups of  cooled coffee, minus 2 teaspoons
2 tsp. peppermint extract
1 package of Andes Mints, crushed into small pieces

Filling:
-1/3 recipe of Swiss Buttercream frosting with 1 teaspoon of peppermint extract and green food coloring to make a light green/minty color.

Frosting:
-2/3 (the rest of the recipe) of Swiss Buttercream frosting with 2 squares of Baker's dark chocolate (melted and cooled slightly).


1. Preheat the oven to 350 degrees F. Butter three 9 inch, round cake pans (or 3 8 inch square pans). Line the bottoms with parchment or waxed paper and butter the paper.

2. In a large mixer bowl, combine the flour, sugar, cocoa, baking soda, cinnamon, and salt. With the electric mixer on low speed, blend for about 30 seconds. Add the butter and buttermilk and blend on low until moistened. Raise the speed to medium and beat until light and fluffy, 2 to 3 minutes.

3. Whisk the eggs, coffee, and peppermint, and add to the batter in 3 additions, scraping down the sides of the bowl and beating only until blended after each addition. Stir in the Andes Mint pieces. Divide the batter among the three prepared pans; each pan will take about 3 1/4 cups of batter.

4. Bake for 38 to 40 minutes, or until a cake tester or wooden toothpick inserted in the center comes out clean. Carefully turn them out onto wire racks and allow to cool completely. Remove the paper liners only when they are cool.

5. When cool--absolutely room temperature, it's time to put the layers together. Set your first layer of cake on your cake stand--if you've got rounded tops, you may want to even those out with a good bread knife. Spread your mint Swiss Buttercream filling onto the first layer, being sure to keep a half inch border around the cake free of frosting. This way, when you press the layers down, icing won't spill out the sides. place on your second layer of cake and press down. Make sure it's even on top. Fill this layer and add on the final layer of  cake and press down to make the top as even as possible.

6. Finally, it is time to frost the cake using your Chocolate Swiss Buttercream Frosting. Here is a video that explains the best way to frost a cake. It would be too difficult for me to describe in writing. You don't have to make your cake super smooth, like this person does, but the basic method of frosting the cake is really easy to follow.


 There were my sheetcakes for the  wedding guests. This just gives you an idea of what the filling should look like. This was a SUPER thick cake :)


Almond Raspberry Cake (adapted from Smitten Kitchen's Vanilla Butterrmilk Cake): Makes one 3 layer 9 inch cake, or a really thick 3 layer 8 inch cake!

3 3/4 cups cake flour
2 1/2 cups sugar
1 tablespoon plus 2 3/4 teaspoons baking powder
1/2 teaspoon salt
2 1/2 sticks (10 ounces) unsalted butter, at room temperature
1 1/4 cups plus 1/3 cup buttermilk
5 whole eggs
2 egg yolks
1 tsp. vanilla extract
2 1/2 tsp. almond extract

 Filling:
1 package almond paste crumbled into food processor with 1/2 teaspoon almond extract (or 1/4 cup of Amaretto), 1/4 cup of powdered sugar, 1/4-1/3 cup of heavy cream. Add first three ingredients, blend until smooth. Drizzle in heavy cream a little at a time until the marzipan filling is light and fluffy--and most importantly--easily spreadable. Taste it. If you want it sweeter, add a couple more teaspoons of powdered sugar. If you want more flavor, add more Amaretto or almond extract.

1/2 cup seedless raspberry jam

Frosting:
1 recipe Swiss Buttercream Frosting with 2 teaspoons of almond extract added


1. Preheat the oven to 325°F. Butter three 9-inch round cake pans. Line the bottom of each pan with a round of parchment or waxed paper and butter the paper.

2. Combine the cake flour, sugar, baking powder, and salt in a large mixer bowl. With the mixer on low speed, blend for 30 seconds. Add the butter and 1 1/4 cup of the buttermilk. Mix on low speed briefly to blend; then raise the speed to medium and beat until light and fluffy, 2 to 3 minutes.

3. In a smaller bowl, whisk together the whole eggs, egg yolks, vanilla, and the remaining 1/3 cup buttermilk until well blended. Pour one-third of the egg mixture into the cake batter at a time, folding it in completely after each addition. There will be 9 cups of batter; our 3 cups batter into each pan.

4. Bake for 26 to 28 minutes, or until a cake tester or wooden toothpick inserted in the center comes out clean.

5. Turn the layers out onto wire racks by placing a rack on top of a pan, inverting it, and lifting off the pan. Peel off the paper liners and let cool completely.

6. To frost the cake, place the first layer on your cake stand, and spread your marzipan filling--keeping a 1/2 inch border free. Take a large spoon of jam and spread it over the layer of filling. Press  on the next layer of cake.Repeat the layer of filling and of  jam. Add on the top layer, making sure it is  as even as possible. Then frost the cake with the rest of the frosting. Here is a good example of how to frost a cake (you can skip the extra-smooth part at the end...rustic  looks better anyway :P).

These are my huge bowls of  frosting to cover all of the wedding cakes. 


Swiss Buttercream Frosting Recipe:
Base to which you add the ingredients listed on the cake recipe of  your choice

2 cups sugar
8 large egg whites
52 tablespoons butter, softened (6 sticks plus 4 tablespoons)
2 teaspoons vanilla extract

Whisk egg whites and sugar together in a big metal bowl over a pot of simmering water. Whisk occasionally until you can’t feel the sugar granules when you rub the mixture between your fingers.

Transfer mixture into the mixer and whip until it turns white and about doubles in size. (Here’s a tip: when you transfer to the mixer, make sure you wipe the condensation off the bottom of the bowl so that no water gets into the egg whites. This can keep them from whipping up properly.)

Finally, add the butter a stick at a time and whip, whip, whip. It will take a good few minutes of whipping for it  to start looking like frosting. At first it will look  curdled, once you have added in all of the butter, but never fear!!! Keep on whipping for a good 5-7 minutes and it should all come together looking the texture of whipped butter or mayonnaise.