Showing posts with label Low Carb. Show all posts

Sunday, May 3, 2015

Kale Salad with Spiced, Roasted Chickpeas and Caesar Dressing

 Looking for a new, interesting salad for this summer? Are you always finding yourself disappointed by soggy lettuce and are afraid to bring a salad to a summer picnic? Well, fear no more...

I have been enjoying sauteed kale for the past year or so, usually with lemon and garlic. It was only recently that I discovered kale is much more sturdy, and much less disappointingly soggy, than lettuce, and that it can be tamed to taste like lettuce in a salad (not crunchy and chewy, like you'd think). The trick is to "marinate" the kale and be sure to cut it properly.

The chickpeas are almost like a crouton, but they are bread-free and a little something different.


Ingredients for Chickpeas:
- 1 can chickpeas, strained, husks removed (press on each one with your thumb), and patted dry
-1 tbsp. olive oil
-1/2 tsp. smoked paprika
-1/2 tsp. chipotle chili powder
-1/4 tsp. garlic powder
-1/4 tsp. onion powder
-1/4 tsp. ground coriander
-1/2 tsp. salt
-1/4 tsp. pepper

Preheat oven to 375F. Combine chickpeas with all other ingredients. Removing the husks is optional, but it will result in a crispier final product.

Place on a baking sheet covered with foil or parchment paper. Bake for 30 minutes, until browned, toasty, and crispy, shaking the pan every once in a while. While those are cooking away...

Ingredients for Caesar dressing:
-1/2 cup mayonnaise
-2 tbsp. olive oil
-1/4 cup fresh lemon juice
-1/4 cup grated Parmesan cheese
-1 garlic clove, grated
-1 tsp. Worcestershire sauce
-1/2 tsp. white vinegar
-1/4 tsp. smoked paprika
-1/4 tsp. chipotle chili powder
-ground black pepper
-salt

Combine ingredients. Add salt to taste. Let sit for about 30 minutes at room temperature to allow the garlic to infuse. And lastly,

Ingredients for salad:
-1 large bowl of kale leaves, thick stems removed, chopped into bite-sized pieces (do not neglect this part)
-1 lemon
-olive oil
-salt
-1 medium carrot, shaved into thin strips

Once you have your bowl of kale lettuce all prepped--NO STEMS ALLOWED!--drizzle over the juice of half of the lemon, a couple of teaspoons' worth of olive oil, and a sprinkle of salt. Toss until well coated and set aside until your chickpeas are cooled completely and you are ready to serve (kale will last overnight in the fridge like this, too (unlike lettuce or spinach!). The lemon breaks down some of the fibrous quality of the kale, and makes it super tender). 

When ready to serve, shave over the carrot. Toss in the amount of dressing you like, and serve with grated Parmesan and the chickpeas on top.


Wednesday, February 11, 2015

Charred Tomatillo and Ancho Chile Salsa

This, my friends, is the mother of all salsas. This is something great. It's smoky, sweet, spicy, and packed full of flavor. Frankly, Tostitos tastes like canned tomatoes compared to this. It's not a very difficult process, and it is SO worth it. Have a go!


Ingredients:

-4-5 good sized, firm tomatillos, husks removed
-1 bunch of cherry tomatoes, removed from vine
-4 dried ancho chiles
-a mix of 5-6 dried guajillo chiles and chiles de arbol (I would do half and half, the chiles de arbol are spicy, the guajillos are sweet and smoky)
-2 large cloves of garlic, husks intact
-1 small bunch of cilantro
-1 tsp. salt
-olive oil
-juice of 1/2 lime (optional)


Lay the tomatoes and tomatillos out on a foil-covered (for your own good) baking sheet. Turn the oven to broil and set the tray inside. Check every few minutes, and once the tomatoes begin to char on top, turn them. Continue to turn every few minutes until the skins start to pull away and crack. Set Aside.


Place a pan over medium-high heat. Pull the stems out from the dried chiles and shake out all of the seeds inside. Put all of the peppers in the hot pan, along with the garlic. Toast until fragrant and the garlic begins to brown.


Peel the husks from the garlic, then add it along with the chiles. Blend until finely chopped.


Next, add your tomatoes and tomatillos (with the skins still attached), cilantro, 1 tsp. salt, and 2 tbsp. olive oil to the blender. Blend until its as smooth as you want. Add salt to taste. For an extra little kick, add a squeeze of lime juice.


Wednesday, January 7, 2015

Macedonian Chicken with Spiced Roasted Carrots and Cucumber Tomato Salad


This month's issue of Bon Appetit magazine was a little flaky--full of that "all natural" heavy-on-the-grains, bee pollen (?) and "nutritional yeast" stuff that appears to have become all the rage in LA and New York (frankly, I am utterly shocked that somehow all this hippy food has ended up in a fancy culinary magazine!). It's a hemp-lover's dream...that's for sure.

...However, there were a few gems I spotted that were rather inspirational: a new take on good sauce reductions and an interesting blend of spices for roasted carrots. I felt the wheels turning, bringing together a series of flavors that are both confusing and mind-blowing. Try this out. You won't regret it!


First, we will start with the salad, since it needs some time to sit.

Cucumber Tomato Salad:

-3 large tomatoes, diced
-1 cucumber, diced
-1/4 cup white wine vinegar
-2 tbsp. red wine vinegar
-1/4 cup olive oil
-1/2 tsp. salt
-1/4 cup chopped fresh parsley
-3 tbsp. chopped fresh dill

Combine everything, and let sit for about half an hour at room temperature.

Next, we will work on the carrots. Once they are in the oven, move to the chicken right away.

Spiced Roasted Carrots:

-1 lb. carrots, peeled and halved both ways, to form 4 inch (or so) pieces
-1/2 cup Greek yogurt
- 7 tbsp olive oil
-1/2 tsp. onion powder
-1/4 tsp. garlic powder
-1 tsp. good quality curry powder or garam masala
-2 cloves of garlic, minced
-Kosher salt
-juice of a lemon
-1/4 tsp. ground turmeric

Preheat oven to 425F.

Add half the yogurt, 1 clove of garlic, and 2 tbsp. olive oil to a bowl. Stir, add a sprinkle of salt, and set aside for serving.

Heat 2 tbsp. olive oil in a pan over medium heat. Add in the turmeric and cook until fragrant. Set aside for serving.

Add the rest of the yogurt, olive oil, onion powder, garlic powder, curry, 1 clove of garlic, and 1 tsp. of salt to a bowl. Toss the carrots in this mixture and spread it on a cookie sheet that's covered with tin foil, making sure they aren't crowded.

Place in oven for 25-30 minutes, until crisp and dark in some spots.

Drizzle over the turmeric oil, yogurt, and a squeeze of lemon and serve.

As soon as you put the carrots in the oven, get started on the chicken. 

Macedonian Chicken:

-3-4 chicken breasts, evenly salted and peppered
-2 sprigs of fresh rosemary, chopped
-zest of one lemon
-1/3 cup of white wine or homemade chicken stock
-1 knob of butter

Heat a stainless steel pan (not non-stick, or you won't get a golden brown crust or a good reduction) to medium-high heat. Once you wave your hand over and feel lots of heat, add a tablespoon of butter and of olive oil. Once it's sizzling and bubbling, place the chicken in. Cook for about 3-5 minutes per side, depending on the thickness of the meat. Only flip once, this way you will get the best amount of browning on each side.

Once cooked through, or a thermometer inserted reaching 160F, set aside on a plate.

Keep the pan over medium heat and add the rosemary, lemon zest, and wine. Scrape up the brown bits and let bubble until reduced by about half. Add a sprinkle of salt, to taste. Take off the heat and add the chunk of butter and stir until melted and creamy. Drizzle over chicken.


Serve everything together.


Friday, November 21, 2014

Avgolemono Soup (Greek Creamy Lemon Soup)

 If you are looking for a new kind of soup to try, this is the one. It's tangy from the lemon, creamy from the egg, and protein-filled (for the men among us). This is my spin off the of original Greek recipe. See what you think!

The key to this recipe is homemade chicken stock. The flavor will stand out, as there really aren't any other heavy flavors involved. Keep it simple--just cook a whole chicken one night and then add the carcass into a stock pot or crock pot with an onion, some carrots, and some celery. Cover it all with water and simmer it for 8-12 hours. Strain through a fine mesh into a jug or pitcher. Boom, done. After it cools to room temperature, you may want to skim any fat off of the surface, but that's not a big deal.


Ingredients:

-1.5 lbs. chicken breasts or thighs (whichever you prefer)
-2 tbsp. butter or olive oil
-1 large yellow onion, finely chopped
-3 large carrots, shredded
-1 tsp. dried oregano
-7 cups of homemade chicken stock
-4 eggs
-1/2 cup lemon juice from good-quality lemons
-1.5 tsp. salt
-pepper
-2 tbsp. fresh dill

-1/2 cup dry orzo pasta (optional)


Preheat your oven to 375F. Cover a pan with foil and lay out your chicken. Drizzle each piece with olive oil and sprinkle evenly with salt and pepper. Rub it all in. When the oven is preheated, slide it on in and let them cook from about 20-30 minutes, until done.

In the meanwhile, chop your onion and shred the carrots. Set a soup pot over medium heat. Once it's hot, add in your butter or olive oil and then the onion and carrot. Let simmer away until it's softened and golden.

Once the chicken is done, set it aside to cool for a moment. Then, shred it up. Pour your chicken stock into the pot and add the oregano. Bring to a simmer. If you are adding the orzo, this is the time to do it, and then cover the pot and continue to simmer for about 8 minutes.

In a small bowl, whisk up your eggs with the lemon juice really well, and when the orzo is cooked (if using) whisk the egg mixture into the simmering soup (not boiling!) in a slow stream. Yes, the whisk will probably get a bunch of veg stuck in it, but the world isn't over. The whisk is the best way to ensure that you don't end up with scrambled eggs. Do not bring the soup to a boil after this. Simmer for about 5 minutes, add in the shredded chicken, dill, and add salt and pepper to taste. Taste, and then serve. Make sure you turn the heat down to low so it doesn't curdle while you aren't looking.


Wednesday, November 12, 2014

Low Carb Asian Style Meatloaf

So, this low carb diet is going surprisingly well. I believe I have come to a place where I have really changed my eating habits for good. Who knows how long I will keep losing weight. It's still coming off at an even pace and I am at 24 pounds today! 

In celebration this this milestone, I thought I would share my dinner with you...

I've never been a fan of the idea of a "meat loaf." The whole thing sounds rather unappetizing--in the same way as boxed "mashed potatoes" or canned "green beans." Well, for some odd reason I found myself standing in the meat section of the grocery store actually wanting to try out a meatloaf. How odd. Now, I obviously omitted the gross parts of a normal meatloaf: ketchup and breadcrumbs. Check out what I came up with instead!


Ingredients:

-2 lbs. ground chuck (stick with 80-90% for moisture)
-2 rashers of bacon, finely diced
-1 tbsp. onion powder
-1 tsp. parsley flakes
-1 tsp. dried chives
-1/2 tsp. ginger
-2 shallots, finely chopped
-2 eggs
-3 tbsp. soy sauce
- 1/4 cup teriyaki sauce
-3 tbsp. tomato paste
-2 tbsp (or more) Asian sriracha sauce
-1 tsp. sea salt

Preheat oven to 350F. Combine all ingredients in a bowl. Spread mixture into a pie plate or casserole dish. Bake for approximately 1 hour, until done in the center. Remove and cool for about 5 minutes. Serve with your favorite vegetable side (ours is broccoli today).

*Now, at this point you may notice there is a lot of juice and fat immersing the loaf. Yes, please cut it in pieces and lay the pieces on a serving plate or something--and dump out that liquid ASAP like it never happened.  Of course, it's necessary for cooking and we love our moist and tender meat, but don't subject your family to the horrors of over-zealous meat juice.*


Monday, October 6, 2014

Jamie's Empire Roast Chicken


Last week I was looking for an interesting roast chicken recipe. Normally I do an herb and garlic roast, and occasionally I add in some lemon. Then, I found this amazing curried roast chicken from Jamie Oliver. Here is what he says about it:

"Ask any British person what their two favourite meals are and I reckon most people would say their mum's roast chicken, and a curry. Well, welcome to Empire roast chicken, a combination of both of those things. Your friends and family are going to love it. I love it. You will love it."

Doesn't that sound beautiful? Of course I couldn't resist. The chicken was, of course like all of Jamie's recipes, fantastically flavorful. I documented the process in my pictures below. 

One thing: I would definitely be sure to use a smaller roasting pan than mine. I had an issue with some burned veg in the bottom of the pan :( The oven is suposed to be at 400F for this, which is very hot. I guess you could just check on it every once in a while and add in a little more stock when necessary...

Here is the recipe.


Check out that gorgeous pile of spices...I have lots of fresh Indian spices and made my own garam masala. We love Indian food.


 Look at that chicken! Be sure to rub the spices all over-inside and outside.


Whisking the flour into the Worcestershire and vinegar.  The beginnings of a great gravy.


 Post-roasting.


Monday, September 29, 2014

Chicken Pot Pie Soup (Low Carb)

Fall is a dangerous time for dieters....Along with cuddly blankets and fireside chats, everyone wants a steaming, chicken pot pie! This soup tastes just like the pie. I didn't miss the original at all (just don't confront me with the pastry!). This is the perfect soup to make in a big batch and eat for the whole week.


Ingredients:

-2 tbsp. butter
-1 cup finely chopped celery
-1 cup finely chopped onion
-1 cup finely chopped carrot
-1 tsp. rosemary
-1/2 tsp. thyme
-1 tsp. parsley
-5-6 cups chicken stock
-1 cup finely chopped potato (you can omit these, or replace with leeks or parsnips if you don't want the starch)

-1/3 cup flour
-1/3 cup butter
-2 cups half and half
-2 cups cream
-2 cups chicken breasts, cubed
-1/2 cup peas
-1/2 cup corn
-salt and pepper to taste
-sharp white cheddar cheese, grated


Preheat a large soup pot over medium. Melt the butter, and once it is brown and bubbling, add in your celery, onion, and carrots. Cook for about 5-8 minutes, until soft and fragrant.

Add in the herbs, potatoes, and chicken stock to cover all of the veg. Stir. Bring to a boil and cover. Turn down the heat to medium-low and simmer for about 15-25 minutes, until the potatoes and carrots are softened.

Set a separate pot to medium heat. Combine the butter and flour and whisk until smooth. Cook until bubbling and golden. Pour in cream and continue whisking. Once this mixture begins to thicken, add in the half and half. Continue to cook until thick and creamy. Pour this mixture into the soup.

Add the chicken, corn, and peas into the soup. Stir well, and taste the sauce. Add salt to taste (I added about 1 tbsp.). Add about 1 tsp. pepper.

Simmer the soup for about 10 minutes to combine all of the flavors. Serve with shredded cheese!


Saturday, September 20, 2014

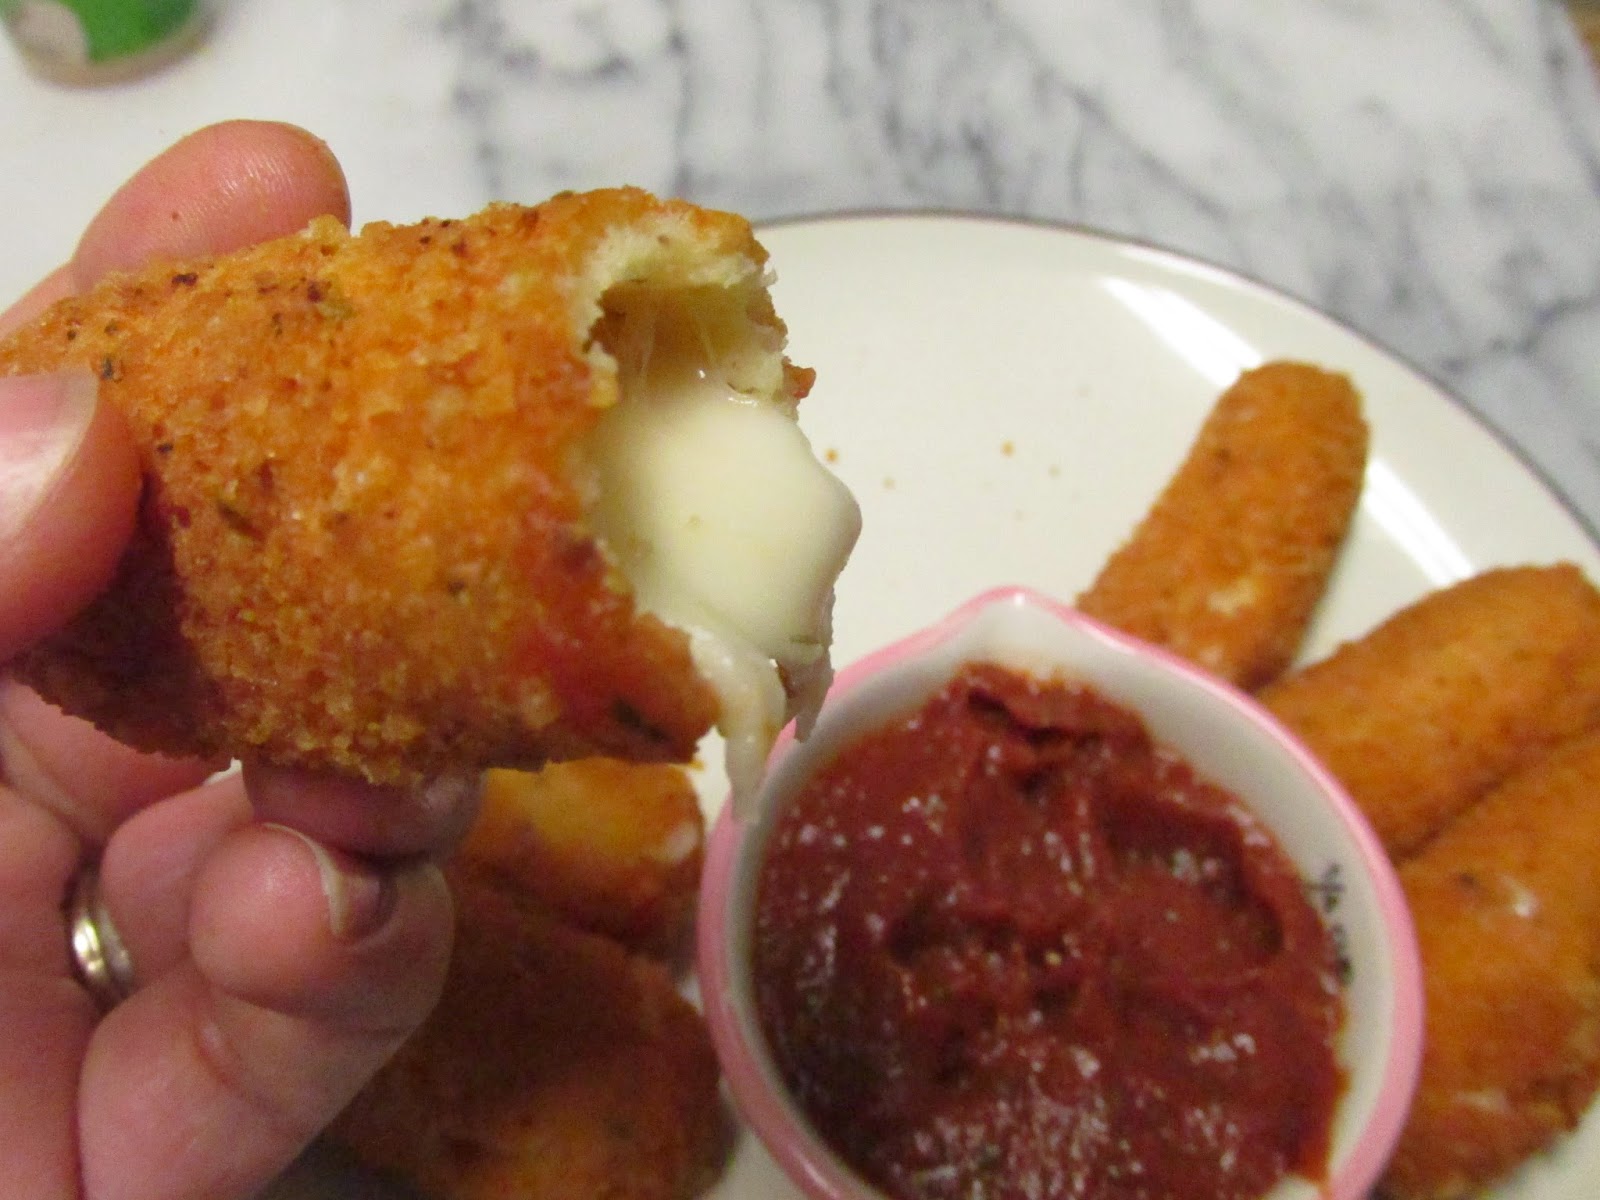
Low Carb Fried Mozzarella Sticks

I apologize for my long absence. Starting a new school year can be overwhelming! I've still been experimenting away, and I have plenty of recipes to add :)


First, I've got this lovely thing. For those of you why are low-carbers, you already know that it's possible to indulge in ways that people on other diets cannot! Yes, you can still have fried food. Of course, it's not an everyday thing, but these sure are delicious.


Ingredients for sticks:

-1 package mozzarella string cheese (shoot for higher fat content)
-2 cups Kraft "Parmesan" cheese (yes, this is the dried, powdered, Parmesan on the shelf)
-1 tsp. paprika
-1 tsp. basil
-2 eggs, whisked with 1/4 cup water
-canola oil for frying

Take as many string cheeses out of their packages as you desire to eat. Cut them all in half.

Mix together your cheese, paprika, and basil in a bowl. Prepare a work space with a plate for the finished sticks, the egg mixture, and the cheese mixture. Try to use one hand for wet and one hand for dry, to prevent having to wash your hands a million times.

Dip a cheese stick in the egg mixture, then into the cheese, and pack on the mixture. Dip in the egg and in the cheese again, double-coating the stick and being sure that every edge is covered. Set onto plate. Repeat with all cheese sticks.

 Once all are coated, wash your hands and then take each cheese stick and roll it along a cutting board or your counter, to make smooth sides, then place the plate of sticks in the freezer for about 30 minutes to an hour. Prepare your oil for frying. Pour about 2 inches of oil into a pan, and set over medium-high heat. To test, place a scrap of vegetable or cracker in the oil. If it starts to sizzle and bubble immediately (without splattering you), the oil is hot enough. If it splatters or smokes, it is too hot so take it off of the heat and wait a few minutes.

Fry the sticks a few at a time until golden. Strain on paper towels and serve with marinara sauce. Make sure you serve them while they are still hot, or the cheese will no longer be gooey.

You can store extras in the freezer.


Here's my quick sauce recipe:

-1 can of tomato paste or sauce
-1 clove of garlic
-2 tbsp. olive oil
-1 tsp. basil
-1/4 tsp. thyme
-1/4 tsp. salt
-water (if using paste)

Mix all ingredients, and if using tomato paste, add about a tablespoon of water at a time until it's the consistency you like for dipping. For sauce, you don't need to add water :)


Tuesday, August 26, 2014

Chicken Tarragon with Lemon Kale, Roasted Parsnips, and Rice

 Chicken Tarragon is a classic. The first time I made it was in my parents' kitchen around age 16. I used the recipe in Delia Smith's cookbook, and it came out amazingly! Today, I came up with my own version, and I think it was up to snuff. I didn't incorporate a few things  from the original recipe, in keeping with my low carb diet, but I made rice (and ate a little bit) because you've got to have something with which to mop up that dazzling sauce.


Ingredients for parsnips:

-4 medium-sized parsnips
-olive oil

Preheat oven to 400F.
Peel your parsnips like you would carrots. Then, slice them in half longways and lay them on a pan covered with tin foil. Drizzle olive oil over them, and rub it all over. Sprinkle them with salt, and rub again, until evenly covered. Place in oven for 20-30 minutes, until deep golden brown. Turn halfway through the cooking time.


Ingredients for kale:

-2 bunches of kale
-1 lemon
-olive oil

Pull the kale leaves off of the thick stalk, Throw those stalks away! Next, chop up the kale in small pieces. This will improve the texture and make it entirely un-slimy. Add the kale to a salad spinner and wash it well. Next, toss it in a bowl with juice from the lemon, 2 tbsp. olive oil, and 1 tsp. salt. Put the kale in a pot and set aside.


Ingredients for chicken:

-2 chicken breasts
-2-3 tsp. dried tarragon (or 1 bunch fresh, leaves picked and chopped)
-salt
-pepper
-2 large garlic cloves
-2 tbsp. butter
-2 tbsp. olive oil
-1/2 cup white wine (something not too sweet, like a Chardonnay or Pinot Grigio)
-1/3 cup heavy cream
-1/4 cup chicken stock

Preheat a pan to medium heat. Sprinkle salt over the top and bottom of each chicken breast. Be sure there is an even dusting--SALT IS FLAVOR!!! Next, add over a sprinkling of tarragon and of pepper on both sides. Peel your garlic cloves.

Add the butter and olive oil to the pan, once bubbling, place in the chicken and garlic. (If you are making rice, now is the time to turn it on).


Flip after about 5-7 minutes, once "half done," and you see white creeping up the sides of the chicken.


On the second side, let the chicken cook for about 4 minutes, then pour in the wine, put a lid on the pan, an turn the heat to low. Simmer for 10 minutes.


After the 10 minutes are up, test the chicken for doneness (prick and if the juices run clear, it's done. You can also use a cooking thermometer to check the temperature has reached 165F). Turn your kale's heat on to medium, and put the lid on.

Remove the chicken breasts from the pan and set aside. Next, mash up the garlic in the pan. It should be buttery and soft. Add in the cream, the rest of the tarragon, and chicken stock. Turn up the heat to a simmer. Taste. Add salt as needed. Simmer until thickened.


Your sauce should be a nice golden color.

Toss the kale after 3 minutes, and continue steaming until softened to your liking.

To plate (the way I did it in this photo), pour a spoon of sauce into the center of a plate. Make a little "nest" shape in the center of a plate out of the kale. Pour in a scoop of rice. lay over some parsnips length- and crosswise. Rest the chicken breast on top. Drizzle sauce over the meat.

To plate the second way, just put the parsnips on top of the chicken instead of under it, and drizzle the sauce around the plate instead of making a pool--I liked the pool better, though. I'm never a sissy with my sauce! Load it up babe!


Sunday, August 24, 2014

Chicken, Bacon, Broccoli Alfredo w/ Zucchini Pasta (low carb, gluten free)

So I must be getting super experimental this week. I wasn't kidding when I told you about rethinking my food worldview (here). I wanted something creamy and rich, and I still was able to create something creamy and rich--without pasta!!

Check it out.


This was my first time making zucchini pasta. I was super skeptical about it, but I went ahead and tried it, as I had 2 zucchinis I needed to use up. It's a little different than pasta because it definitely has more of a fibrous "bite" to it, but the texture and flavor work out really well. Zucchini is amazing at absorbing flavor of surrounding sauces, and it's also soft yet firm, like good al dente pasta must be. I encourage you to give it a go!

This is the best recipe I've seen for zucchini pasta, so I will send you off to "He Speaks in Silence" where you must find the zucchini noodles recipe.

Once your noodles are ready, follow my recipe below:

Ingredients:

-zucchini noodles made from 6-8 zucchini
-2 chicken breasts
-12 rashers bacon, cooked until crispy and crumbled
-1 crown of broccoli, chopped into bite-sized pieces
-2 cloves of garlic, chopped
-4 oz.(half a packet) cream cheese
-2 oz. (half a stick) butter
-1/2 cup milk
-1/2 cup chicken stock
-1/2 tsp. thyme
-1/3 cup fresh shredded Parmesan cheese

Preheat your pan to medium heat. Salt the chicken breasts, and once the pan is hot, add in a bit of olive oil and lay in the chicken. Cook for about 6-8 minutes per side (with thick chicken breasts). You can slice them in half longways or attack them with a hammer (aka meat tenderizer) if you want to speed up that cooking time. Remove them from the pan when finished.

Precook the broccoli by placing it in a pot and covering it with water. Bring to a boil, and simmer until tender. Strain and set aside.

Add the cream cheese and butter to the pan in which you cooked the chicken. Stir over medium heat. Add in the garlic and milk. Whisk until smooth. Pour in stock and thyme, then bring up to a simmer. Cook until the sauce begins to thicken, then add the cheese. Taste, and add salt as needed.

Add in your zucchini pasta, bacon, chicken (sliced), and broccoli. Bring heat down to low, and toss to combine. Put the lid on and let it sit for about 5-10 minutes, so all of the flavors can combine.

Serve!


Thursday, August 21, 2014

Mexican Chocolate Pudding (Sugar-free, Lactose-free)

I've been on the hunt for desserts lately. I'm going on 2 full months of this low glycemic thing and it's time for some sweets. I came across a "paleo" recipe for pudding. But pudding is not interesting enough. As I was experimenting with a recipe, I thought I would add a little flair--I've had Mexican hot chocolate before, which was delicious, so I channeled that into the recipe below.


Ingredients:

2 cups almond milk or coconut milk
1/4 cup packed cocoa powder (I used Hershey's Special Dark)
1/3 cup plus 3 tbs. Splenda or other sugar substitute
a pinch of salt
a pinch of cayenne pepper
1/2 tsp. cinnamon
3 egg yolks
2 tbsp. corn starch (or arrow root powder) mixed with 2 tbsp. water
2 tbsp. sugar-free chocolate or unsweetened baking chocolate


Combine milk, cocoa, Splenda, salt, cayenne, and cinnamon in a saucepan over medium high heat. Stir continually, until steaming (not bubbling). Whisk in 1 egg yolk at a time, then pour in corn starch mixture and continue whisking until mixture begins to thicken.

Take off heat. Sprinkle in the chocolate and whisk until all melted. Pour into 4 serving bowls, cover with plastic wrap (be sure to press the wrap down into the bowl so it is sticking to the top of the pudding, then a skin won't form). Or--you can eat it warm, too!

Serve with a sprinkle of cinnamon on top, or some whipped coconut cream.


Sunday, August 17, 2014

Properly Grilled Brats with Sauteed Green Beans

This is a great summer recipe that's also low carb/low glycemic friendly. You may think that it doesn't sound very special or interesting, but I suppose the main reason I am posting this is the special method of cooking the sausages. I just learned today that I've been grilling them the wrong way!


Also, I thought I would share the green bean recipe, as I have been cooking them this way for years. It's hard to think of anything that will go well with sausages other than some form of potatoes or salad. I know so many people who eat mushy green beans from a can. These are really flavorful, with bite and personality. They also complement the beerish flavor of the sausage.

You will see in the pictures I also grilled corn (not very sausage-y). I buttered, salted, and peppered it and wrapped it in foil before putting it on the top rack of the grill for about 20 minutes, turning regularly. Simple.

Ingredients for brats:

-1 package bratwursts
-1 bottle beer

Preheat grill to medium-high heat for about 10 minutes.

Pierce each sausage with a fork.

First, we have to par-boil the sausages. This way they will cook evenly and have a firm, juicy texture. If you just toss sausages on a hot grill you run the risk of either burning them on the outside and making them under-done on the inside or making them all dried out and wrinkly. Neither of these make for a good meal. This technique is genius and (as you see in the photo below) results in a smooth inner texture that is not greasy or chunky, and a crisp outer skin.

Place the sausages in a pan and pour in the bottle of beer. Fill up with water until completely covered. Turn the heat to medium high and let simmer for about 6-8 minutes, until a thermometer inserted into a sausage reads 150F. Place sausages on a plate.

(Start the corn about 15 minutes before you put on the sausages). Turn the grill heat to high, and place the sausages on it. Let them cook about 2-3 minutes per side, enough to get some grill marks and crisp up the skin.

Serve.


Ingredients for green beans:

-6 oz. fresh green beans
-1 clove garlic, chopped
-2 tbsp. butter
-1/4 tsp. dried thyme
-1/2 tsp. salt
-1/2 cup chicken stock

Top and tail the beans.

Preheat a pan to medium heat. Once the pan is hot, add the butter, garlic, and thyme. Saute until golden, then add in the beans and salt. Toss to combine. Pour in the stock and simmer until fully evaporated, 10-15 minutes.


Wednesday, August 6, 2014

Reconstructing My Food-Worldview

It's amazing how easy it is to gain weight. Many of you would know more about the struggle than I. I have not yet had children, I have not encountered any health problems, and I have not even hit age 22! However, hopefully you will find this advice helpful.

We all know that it's so easy to have dessert when we feel like it. It's pleasurable to fill ourselves with yummy bread, sweets, cakes, french fries, pasta, and all sorts of delicacies. I know that more than most, as I spend most of my life in the kitchen. I swore to myself, the day I learned to cook, that I would NEVER settle for boring food again. I still don't. But there is a reason I went from 135 to 173 pounds since I quit ballet, and along with that, lost all desire to be a careful eater.

I would to sit down to my computer, pull up Pinterest or a cooking show I missed, and say to myself, "And now....what enrapturing dishes shall I cook up this week? Why not start with some Moroccan recipes!" Every week my ritual gave me such release and such peace--like going into your quiet place to paint, to read, or to write. And I had so many different ideas that it took me hours and hours to schedule and plan the meals I would create. I drifted through the grocery store just eating everything with my eyes; I spent hours in Asian and Indian markets when I got the chance, just to stir the trade winds of my imagination. My parents thought it was so odd that I enjoyed going to the grocery store as much as some people enjoy going fishing or shopping or to a movie. I didn't care about calories or carbs at that point. I just wanted to be inspired and to create something new. 

Now I've changed. I can still be creative in my cooking, but I have rules to follow to guide me down the road. I can't eat lots of carbs and stay thin. This is something with which I must finally come to terms. So, instead of viewing my diet as shackles destroying my freedom to be creative, I view it as a guide rail for my passion for food. These guide rails will help me lead myself into the center of creative thinking about good food. Whereas before I stumbled all over the place and wanted to learn everything about making every single food (which I could never do in a lifetime), I now have a "map" to follow. In the grocery store I no longer wander to the dessert counter to gaze longingly at the chocolate cake I cannot eat. I follow the guard rails to what is healthy, and I create tasty food out of those options alone. I avert my eyes from what I know is bad for my body. It's actually more of an exciting challenge this way. Anyone can bake blueberry muffins...but not just anyone can make GOOD blueberry muffins without regular flour.

I can easily relate this to my faith in Christ. Yes, God gives us commands to follow, and some may see that as stifling, but it is really freeing! The Holy Spirit is our "guard rail" who guides us through the chaos and whispers to us to turn our head when we look towards the temptations. We keep our eyes on the goal. At the end of the trials of life, we will reap a great reward for our faith and our trust.

Now I recognize my responsibility to follow the straight and narrow path in all areas of my life, especially in nourishing my family. I won't lead myself and my family into obesity (or even pleasantly-plumphood), but will strive to make us healthy, happy, and full of energy--without the suffering I experienced as a struggling, dieting ballet dancer.

I still need to keep my promise that I will never cook boring, yucky food. I will never serve un-flavorful, mushy vegetables with plain 'ole chicken and call it a meal. I want my family to feel special, to eat like kings so they can share with me my joy of cooking. And I will do my best to strive toward that goal. Yes, some days there will still be rice. I may cook a cake for special occasions. But I will never again live like my body can take whatever I "feel like" giving it. That is not honoring my family, it's not honoring God's creation, and it's not honoring the transforming work of Christ in me.

Sincerely, 

8 Pounds Lost, and Counting

**Update 2/13/15: 29 pounds lost and counting!! 


Wednesday, July 16, 2014

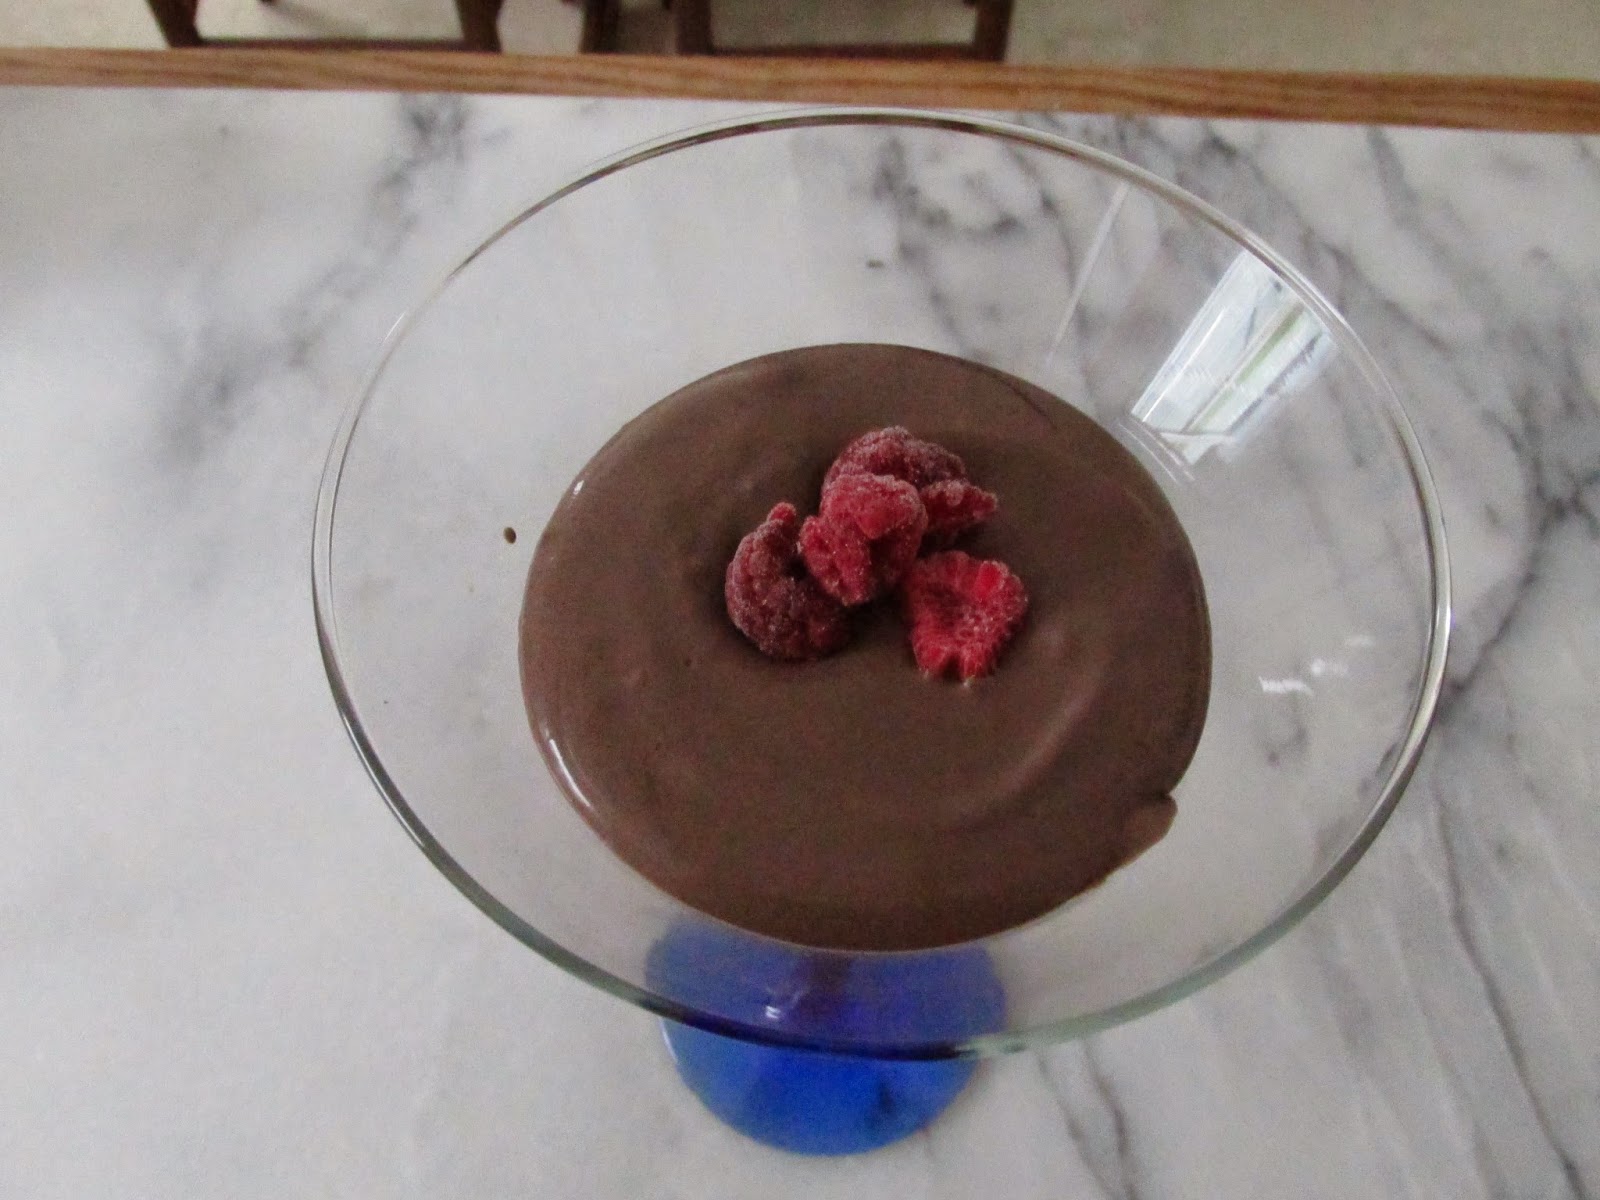
Coconut Cream Chocolate Mousse (Low Carb; Vegan)


I recently started a low carb diet, so I am always looking for ways I can cheat!! This mousse tastes just as light and fluffy and chocolatey as the normal stuff-it's just got a hint of coconut flavor. You'll enjoy it, to be sure.


Ingredients:

-1 can unsweetened, full fat coconut milk (the brand below or Thai Kitchen are good)
-1 Tbsp. cocoa powder or ground cacao nibs
-1/2 tsp. vanilla
-3/4 tsp. stevia or other sweetener
-fresh berries (optional)


First, make sure you place that can of coconut milk in the fridge for at least 8 hours. The cream sits on top of the coconut water, so the longer it refrigerates, the easier it will be to scoop away the cream. Also, if you don't refrigerate it before you add in your cocoa and such, it will get all grainy when it solidifies in the fridge. Just trust me-spend the extra time to let it harden.


Once fully refrigerated, open your can and scoop the cream into a bowl. Be sure you don't get any of the water in there! You can save that for later and add it to another recipe, or just toss it.

Next, whip your cream with a whisk to make it fluffy.


Stir in your cocoa, vanilla, and stevia.


Put it back in the refrigerator until ready to serve.


You can pipe it into a serving dish like this to make it fancy....


Or, you can serve it in a martini glass, like me!